Kodak EasyShare printer dock series 3 — User's Guide
Table of Contents > Installing software > Installing the software
4 Installing software
Installing the software
|
|
|
|
|
||
|
|
||||
|
|
|
|
|
||||
|
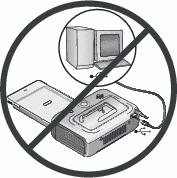
1.
Close all software applications that are open on your computer (including anti-virus software).
|
|||||||
|
2.
Place the Kodak EasyShare software CD into the CD-ROM drive.
|
|||||||
|
3.
Load the software:
|
|||||||
|
4.
Follow the on-screen instructions to install the software.
|
|||||||
|
5.
Restart the computer if prompted. If you turned off anti-virus software, turn it back on. See the anti-virus software manual for details.
|
|||||||
For more information on installing the software, see the ReadMe file on the Kodak EasyShare software CD. For information on the software applications included on the Kodak EasyShare software CD, click the Help button in the EasyShare software.
Uninstalling the software
If you wish to remove the printer driver or EasyShare software from your computer, use the following procedure:
Windows OS-based computer:
-
Open the Control Panel:
From the Start menu, select Settings, then select Control Panel. (On Windows XP operating systems, depending on your configuration, Control Panel may be found in the Start menu.)
-
Double-click Add/Remove Programs.
-
Select Kodak EasyShare software, then click Remove.
-
Select Modify to uninstall single components, such as the printer driver, or select Remove to uninstall all components.
-
Follow the on-screen instructions. Restart the computer if prompted.
Mac OS X:
-
Double-click the operating drive for your system.
-
Select Library, then select Printers.
-
Open the Kodak folder, then open the printer dock folder.
-
Double-click the printer dock uninstaller program.
-
Follow the on-screen instructions.
Previous Next