KODAK ESP Office 6100 Series All-in-One Printer — Extended User Guide
Table of Contents > Handling Paper > Loading paper
3 Handling Paper
Loading paper
Loading plain paper
The paper tray capacity is 200 sheets of plain paper.
To load plain paper:
-
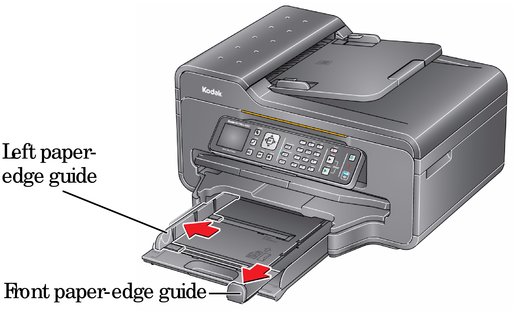
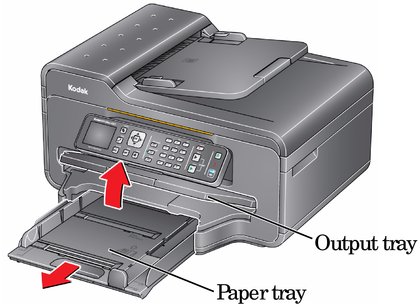
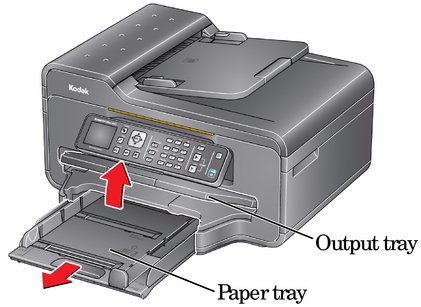
Raise the output tray, and pull out the paper tray.

-
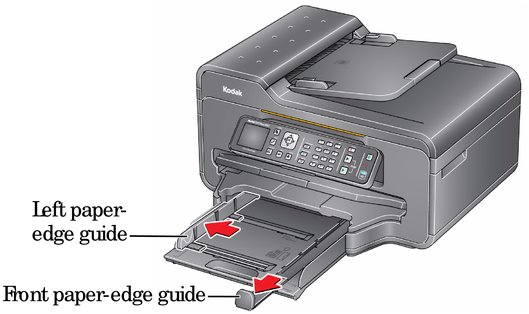
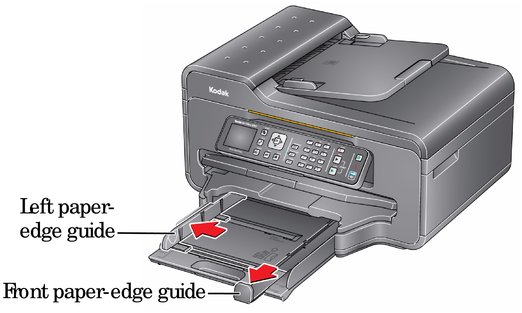
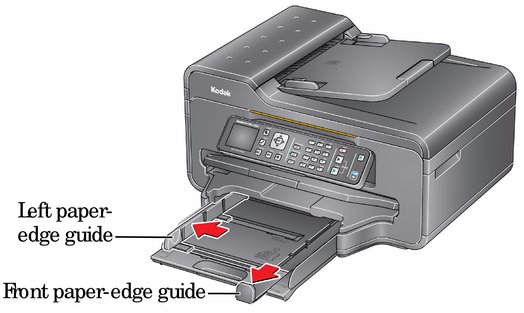
Make sure the left paper-edge guide is to the far left.
-
Move the front paper-edge guide forward.
-
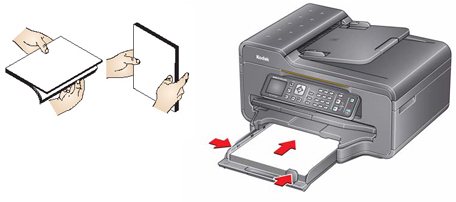
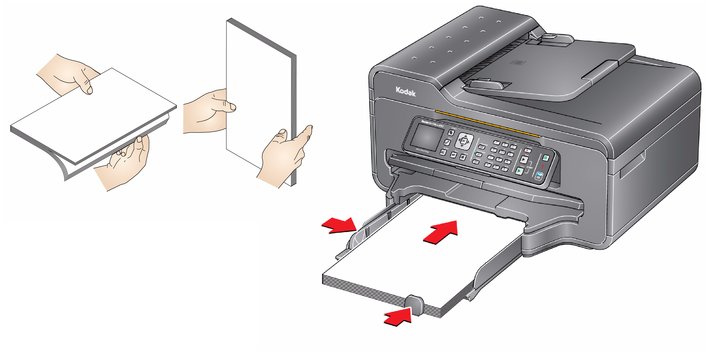
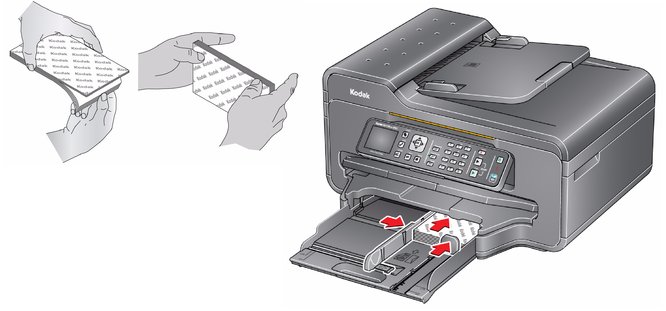
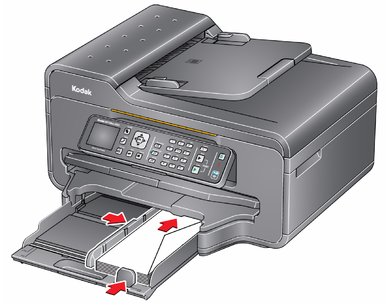
Fan and stack the paper, then insert it into the tray.
-
Move the paper forward until it stops.
-
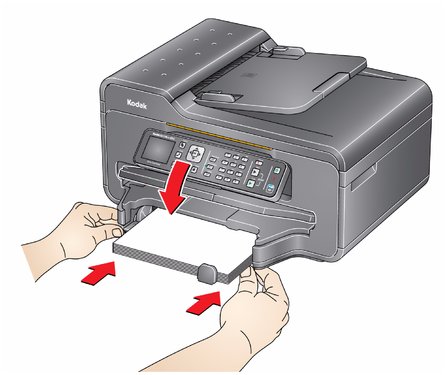
Move both the left and front paper-edge guides until they touch the paper.
-
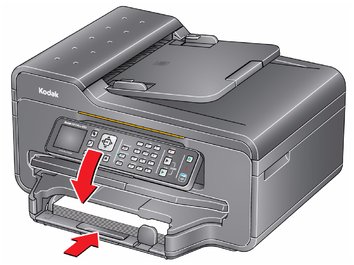
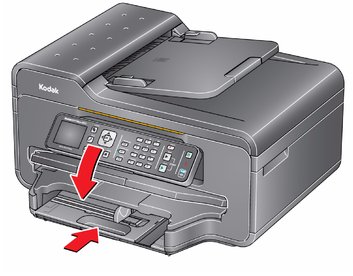
Push in the paper tray until it clicks into place, and lower the output tray.
-
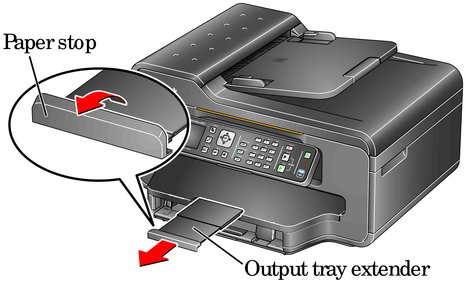
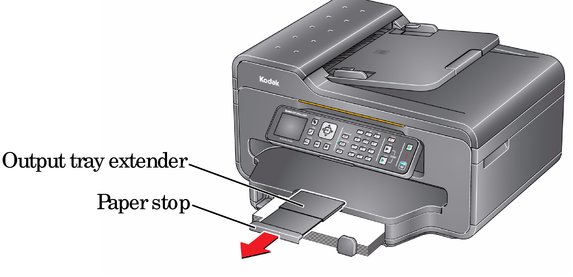
Pull out the output tray extender until it is fully extended.
-
Loading legal-size paper
The paper tray capacity is 200 sheets of legal-size (8.5 x 14 in. / 22 x 36 cm) paper.
To load legal-size paper:
-
Raise the output tray, and pull out the paper tray.
-
Make sure the left paper-edge guide is to the far left.
-
Move the front paper-edge guide forward until it is fully extended.
-
Fan and stack the paper, then insert it into the tray.
-
Move the paper forward until it stops.
-
Move both the left and front paper-edge guides until they touch the paper.
-
Push in the paper tray until it clicks into place, and lower the output tray.
-
Pull out the output tray extender until it is fully extended, but do not lift the paper stop.
Loading photo paper
The paper tray capacity is 60 sheets of photo paper.
To load photo paper:
-
Raise the output tray, and pull out the paper tray.

-
Remove any paper from the tray.
-
Make sure the left paper-edge guide is to the far left.
-
Move the front paper-edge guide forward.
-
Fan and stack the photo paper, then insert the paper (short side first) into the tray with the logo side facing up and the glossy side down.
IMPORTANT: If the photo paper is loaded the wrong way, the ink on your pictures will be wet and the image quality will be affected.
-
Move the paper forward until it stops.
-
Move both the left and front paper-edge guides until they touch the paper.
-
Push in the paper tray until it clicks into place, and lower the output tray.
NOTE: If you are using 8 x 10 in. / 20 x 25 cm or larger photo paper, pull out the output tray extender until it is fully extended, and lift the paper stop.
Loading envelopes
The paper tray capacity is 20 envelopes.
| IMPORTANT: | Do not load envelopes with cutout or clear windows. |
To load envelopes:
-
Raise the output tray, and pull out the paper tray.
-
Remove any paper from the tray.
-
Make sure the left paper-edge guide is to the far left.
-
Move the front paper-edge guide forward.
-
Insert the envelopes into the tray with the flap up and against the right side of the tray.
-
Move the envelopes forward until they stop.
-
Move both the left and front paper-edge guides until they touch the envelopes.
-
Push in the paper tray until it clicks into place, and lower the output tray.

Previous Next