KODAK PULSE Digital Frame — Extended user guide
Table of Contents > Product Overview
|
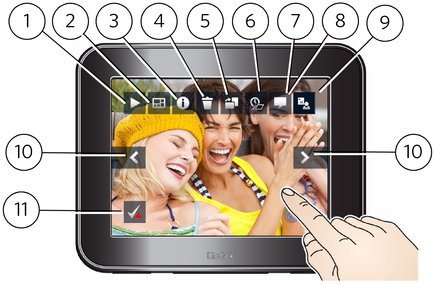
Touch the screen anywhere to display the icons, then touch an icon to: |
|
|
1 |
|
|
2 |
|
|
3 |
|
|
4 |
|
|
5 |
|
|
6 |
|
|
7 |
|
|
8 |
|
|
9 |
|
|
10 |
|
|
11 |
|
 Play—start or resume a slide show.
  Collage—start a revolving five-picture slide show.
  Information —view picture information.
  Delete—remove pictures from the digital frame.
  Rotate—rotate the displayed picture 90° clockwise.
  Transition time—change the display duration and transition type.
  Quick comment—send a comment to the originator when pictures arrive from FACEBOOK or email.
  Copy (not shown)—copy pictures from a memory card or USB device to your digital frame internal memory (appears only when a memory card or USB device is inserted).
  Picture sources—view pictures in internal memory by friends or playlists; or view pictures on an inserted memory card or USB device.
 Previous/Next—view the previous/next picture.
  Health Check—check/fix your network connection (only appears if there is a network connection problem).
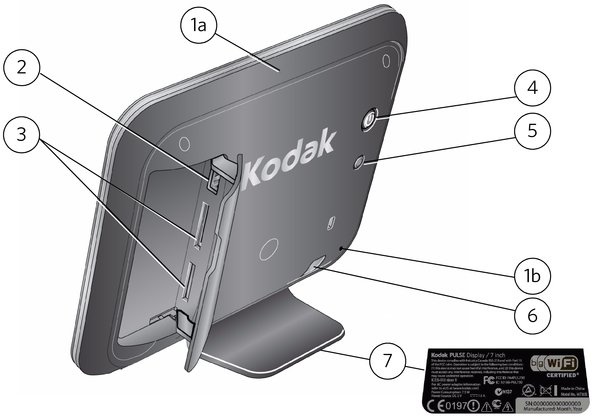
 Back panel buttons and connectors
|
1a |
Activity sensor (light) |
Activity sensors are a new feature and are not found on earlier PULSE Digital Frame models. See Automatic on and off. |
|
1b |
Activity sensor (sound) |
|
|
2 |
USB connector |
|
|
3 |
Memory card slots |
|
|
4 |
Power |
Press to manually turn the digital frame on or off. Se e also, Automatic on and off. |
|
5 |
Health check |
Press to open the Health check screen. See Health Check. |
|
6 |
Power connection, DC-in |
|
|
7 |
Data plate |
Contains model name and serial number (on bottom of foot). |


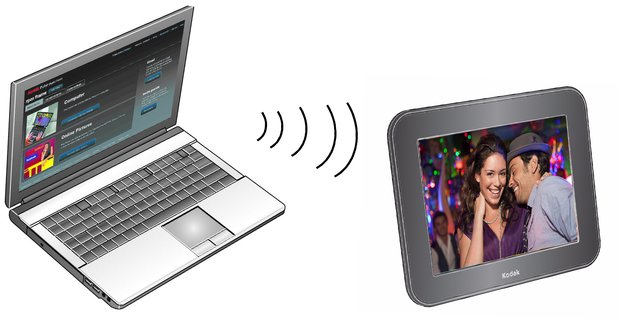
On your computer, create your free www.kodakpulse.com account and activate your digital frame (see Activating your frame—www.kodakpulse.com). Then sign in to your account to:
|
 When you see the laptop icon in this user guide, go to your computer and sign on to your kodakpulse.com account to use expanded PULSE Digital Frame features and settings.
Previous Next