KODAK ESP 3.2 and 3.2s All-in-One Printers — Extended User Guide
Table of Contents > Scanning > Scanning from the control panel
8 Scanning
Scanning from the control panel
When you scan a document or picture(s) from the control panel, you have the following options:
-
Scan to Computer - scans to a file or to Home Center Software on your computer
-
Scan to Memory Card - scans to a memory card in the memory card slot
-
Scan to Email* - scans to an email address that you select from the Email Profile you set up in the Online Printer Management Tool
-
Scan to Network Folder* - scans to a shared network folder that you designated in the Online Printer Management Tool
* Before you can use these options, you must set up Scan to Email (see Setting up Scan To Email) and Scan to Network Folder (see Setting up Scan To Network Folder) from the Online Printer Management Tool.
Scanning to a computer
-
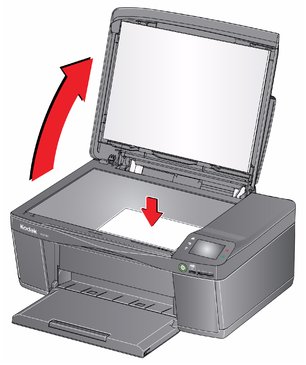
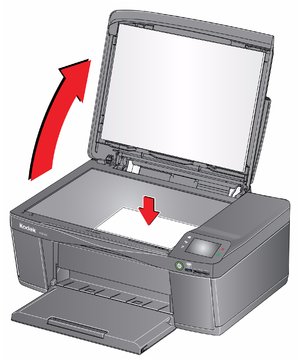
Lift the scanner lid, and place the original face down in the right-front corner of the scanner glass, then close the lid.

-
Close the lid.
-
Press
 .
. -
Touch Scan.
-
Touch Scan to Computer, then touch the setting/option you want to change.
Scan Option Settings Description Scan To
USB Computer (default)
The scanned file is sent to the USB Computer.
Name of computer (only if a computer is connected by wireless network)
The scanned file is sent to the computer on the wireless network.
Scan What
Document (default)
Sets the scan settings for scanning a document (see Changing the scan settings for scanning from the printer control panel).
Photo
Sets the scan settings for scanning a picture (see Changing the scan settings for scanning from the printer control panel).
Scan Action
File (default)
Sends the scanned file in the format and to the location on your computer that you designate.
Application (available only when Home Center Software is installed on computer)
Sends the scanned file to Home Center Software.
Save as Defaults
No / Yes
To save the settings as the new defaults, touch Yes.
-
Press
 .
. -
When the message "Scan complete" appears, touch OK. The scanned file appears at the destination you specified.
Scanning to a memory card
-
Lift the scanner lid, and place the original face down in the right-front corner of the scanner glass, then close the lid.

-
Close the lid.
-
Press
 .
. -
Touch Scan.
-
Touch Memory Card, then touch the setting/option you want to change.
Scan Option Settings Description Scan What
Photo (default)
Sets the scan settings for scanning a picture (see Changing the scan settings for scanning from the printer control panel).
Document
Sets the scan settings for scanning a document (see Changing the scan settings for scanning from the printer control panel).
File Type
JPG (default)
The scanned file is saved as a JPG.
Single-page PDF
The scanned file is saved as a single-page PDF.
Multi-page PDF
The scanned file is saved as a multiple-page PDF.
Scan Size
Auto (default)
2 x 3
3.5 x 5
4 x 6
4 x 7
4 x 8
5 x 7
4 x 12
8 x 10
8.5 x 11
A4
8.5 x 14
Determines the size that is scanned.
Save as Defaults
No / Yes
To save the settings as the new defaults, touch Yes.
-
Press
 .
. -
When the message "Scan complete" appears, touch OK. The scanned file appears at the destination you specified.
Scanning to email
You can scan your original and immediately send the scanned file by email to one or more recipients directly from the printer.
| NOTE: | You must first use the Online Printer Management Tool to set up scanning to email options (see Setting up Scan To Email). |
-
Lift the scanner lid, and place the original face down in the right-front corner of the scanner glass, then close the lid.
-
Close the lid.
-
Press
 .
. -
Touch Scan.
-
Touch Email.
-
Select an outgoing email profile (the person from whom the email with the scan attachment is sent), then press OK.
-
If necessary, enter the 4-digit PIN number (see Step 9, page ), select Done, then press OK.
-
Select an email recipient, then press OK.
-
Repeat step 8 for each recipient.
-
Press
 .
. -
When the message "Scan complete" appears, touch OK. The scanned files appears at the destination you specified.
Scanning to network folder
You can scan your original and immediately send the scanned file to a network folder directly from the printer.
| NOTE: | You must first use the Online Printer Management Tool to set up scanning to network folder options (see Setting up Scan To Network Folder). |
-
Lift the scanner lid, and place the original face down in the right-front corner of the scanner glass, then close the lid.
-
Close the lid.
-
Press
 .
. -
Touch Scan.
-
Touch Scan to Network Folder.
-
Touch Sharing folder.
-
If necessary, enter the 4-digit PIN number (see 9, page ), then touch OK.
-
Press
 .
. -
When the message "Scan complete" appears, touch OK. The scanned file appears at the destination you specified.
Previous Next