Kodak EasyShare printer dock plus — User's Guide
Table of Contents > Getting started > Installing and removing the color cartridge
1 Getting started
Installing and removing the color cartridge
| IMPORTANT: | Use only Kodak color cartridge & paper kits for your printer dock. Do not force the cartridge in or out of the printer dock. |
|
|
|
|
|
||
|
1.
Open the cartridge door on the side of the printer dock.
|
|||||
|
2.
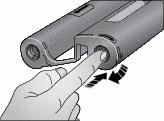
Check to make sure there is no slack in the color cartridge ribbon.
To remove slack, push in on the cartridge spool, then rotate the spool clockwise.
|
||||
|
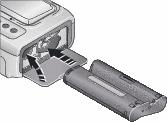
3.
Slide the color cartridge in, label side up, with the arrow pointing toward the printer dock. Push the cartridge until it "clicks" into place.
|
||||
|
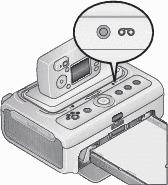
4.
Close the cartridge door.
|
|||||
|
|
|
|
|
|
|
||
|
|||
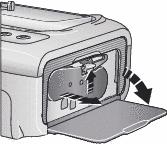
| IMPORTANT: | The color cartridge may lock in place if there is a paper error. Do not attempt to remove the color cartridge without first clearing the paper error. Make sure the Paper light is off before attempting to remove the color cartridge. |
|
|
|
|
|
|
To remove the color cartridge, open the color cartridge door, then push up on the green lever and slide the cartridge out. |
||
Previous Next