Kodak ESP 3 All-in-One Printer — User Guide
Table of Contents > Maintenance > Printhead
7 Maintenance
Printhead
The printhead dispenses the ink from the ink cartridges onto the paper.
Printhead Alignment
The printhead may need to be aligned to enable high-quality prints. The Kodak printer automatically performs a calibration every time you install or replace a printhead. You can also initiate a printhead alignment from the ESP 3 printer driver, Home Center software, or control panel.
To align the printhead from the control panel
-
Load the paper tray with US letter or A4 Kodak plain paper.
-
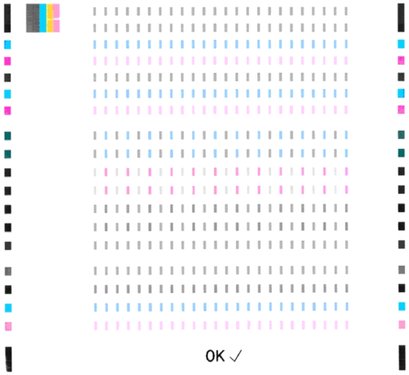
On the control panel, press and hold Scan and Cancel at the same time until the On/Off light starts blinking. The following pattern is printed and calibration is complete when the page is printed.
Clean Printhead
Run a printhead cleaning if color is faded or missing by pressing and holding Copy and Cancel at the same time.
Replace the Printhead
If your printhead is damaged or broken it is easy to replace yourself.
-
Make sure the Kodak ESP 3 All-in-One printer is on.
-
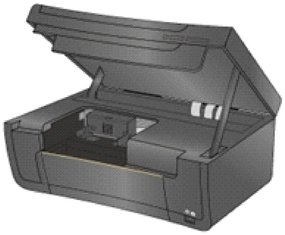
Open the printer access door.
-
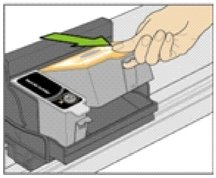
Pinch the latch on the ink cartridge with your thumb and forefinger and lift it out of the print head. Remove both ink cartridges.
-
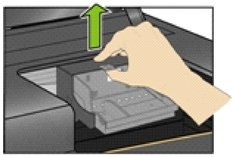
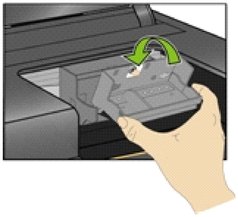
Unlatch the printhead by pressing the release on the top of the carriage.
-
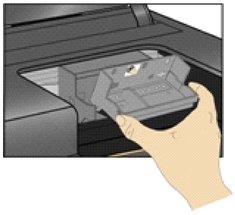
Remove the old printhead from the carriage.
-
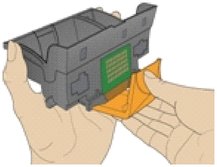
Remove the new printhead from its bag.
-
Remove and discard the black plastic casing and the orange protective cap.
-
Place the new printhead into the carriage.
-
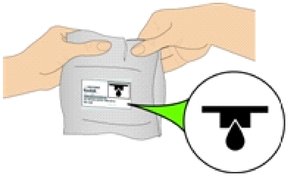
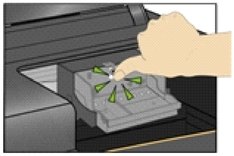
Push firmly against the target label on the printhead until you hear it click into place.
-
Close the printer access door.
Previous Next