KODAK ESP 3.2 and 3.2s All-in-One Printers — Extended User Guide
Table of Contents > Online Printer Management Tool > Using the Online Printer Management Tool
3 Online Printer Management Tool
Using the Online Printer Management Tool
Configuring printer settings
-
Open the Online Printer Management Tool (see Accessing the Online Printer Management Tool).
-
Select the Settings tab.
-
Select Device.
-
Select General or Date & Time, and make any necessary changes.
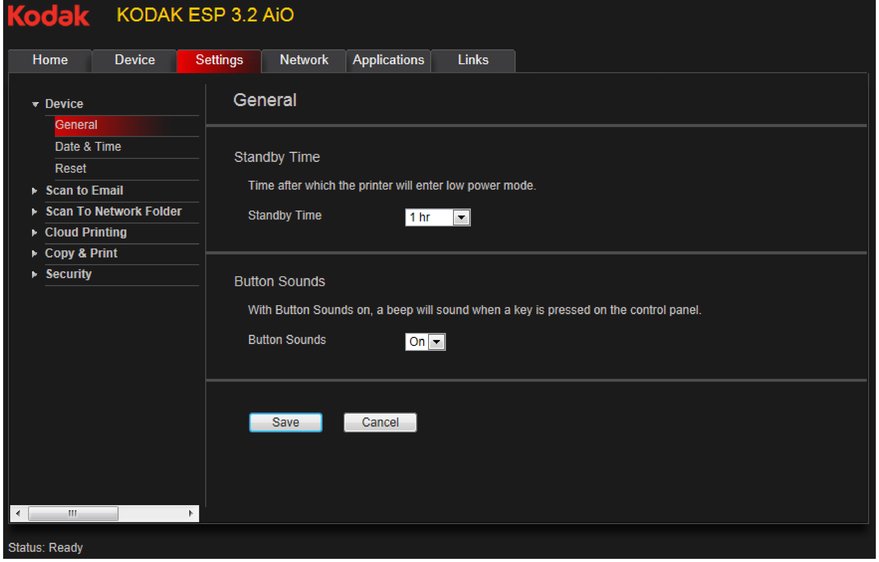
-
Click Save.
NOTE: Select Reset to restore the default settings, if necessary.
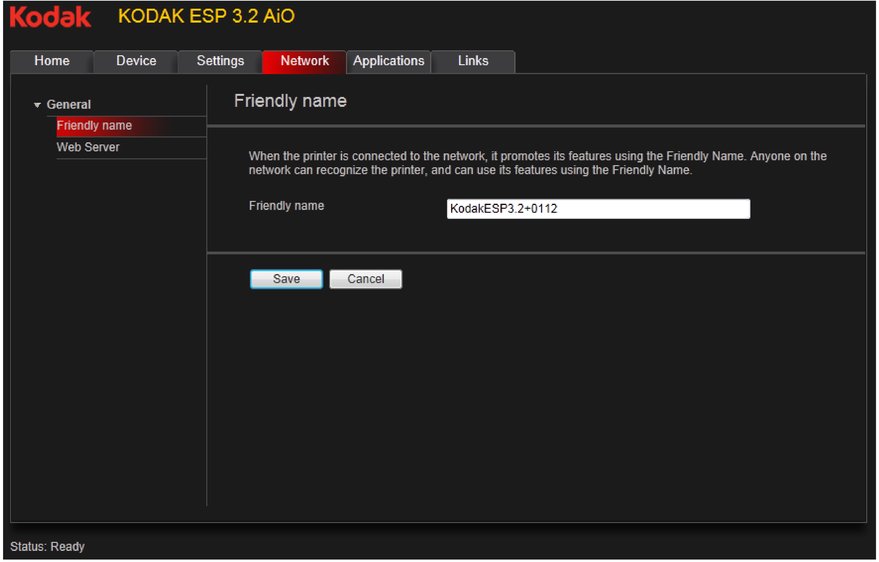
Changing the printer name
-
Open the Online Printer Management Tool (see Accessing the Online Printer Management Tool).
-
Select the Network tab.
-
Select General, then Friendly name, if necessary.
-
Highlight the text in the Friendly name field and type the name you want, then click Save.
Setting up Scan To Email
When you scan with your printer, you can send the scans directly from the printer to an email recipient. To do so, you must first set up a profile for yourself, and define the email address(es) to which you want to send scans.
Adding an outgoing email profile
-
Open the Online Printer Management Tool (see Accessing the Online Printer Management Tool).
-
Select the Settings tab.
-
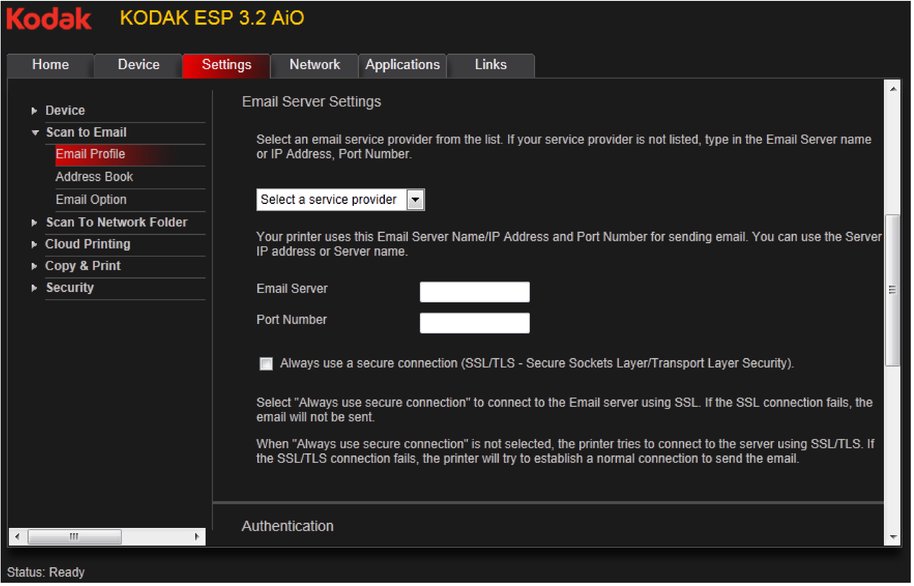
Select Scan To Email > Email Profile.
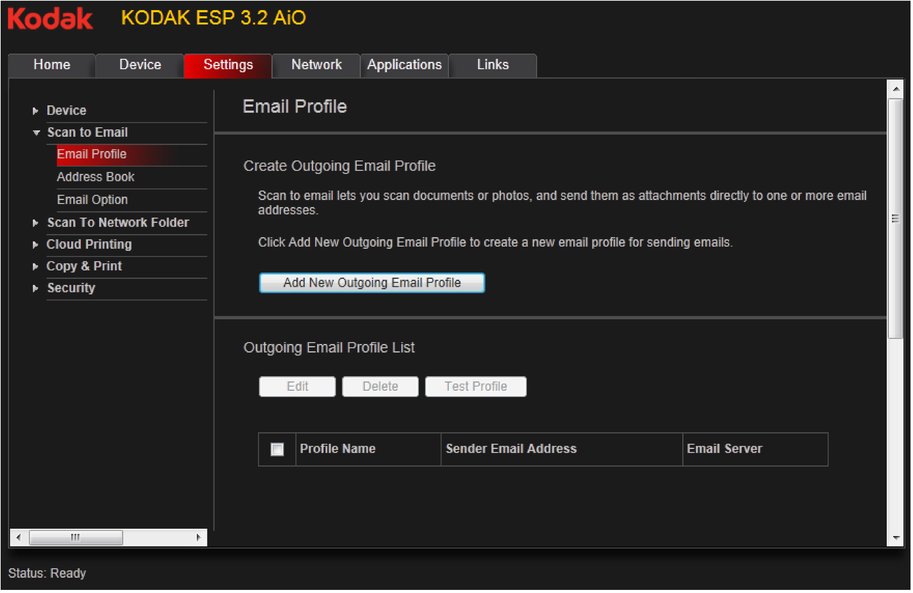
-
Click Add New Outgoing Email Profile.
-
In the Profile Name field, type a name that has meaning to you; for example, your initials and your email provider, such as LR Hotmail or LR Gmail.
This name will appear on the printer control panel when you start a scan to be sent through email.
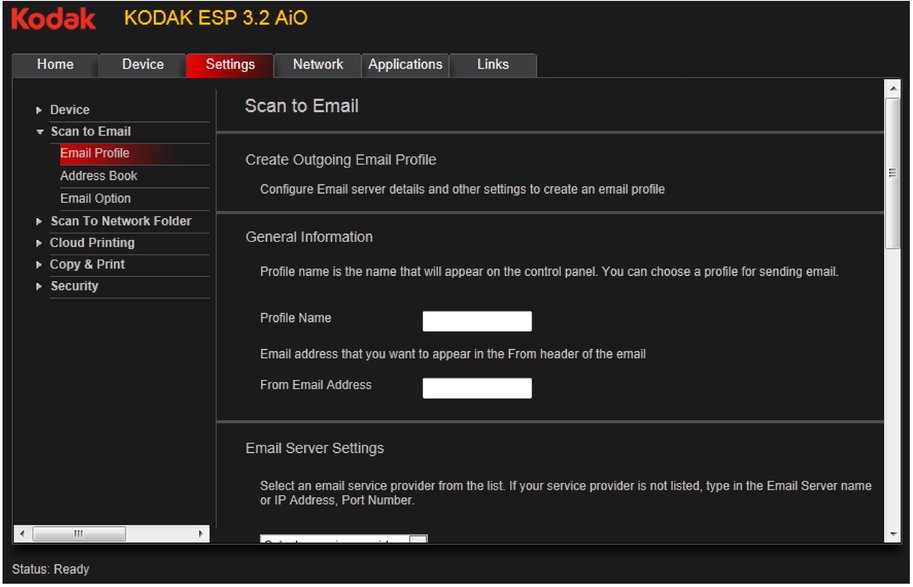
-
In the From Email Address field, type your email address.
Although the email will be sent from the printer, any replies will go to this email address.
-
Under Email Server Settings, enter your email service provider.
-
If your email service provider is Gmail, Yahoo, AOL, or Hotmail, select your services from the drop-down menu. The Email Service and Port Number fields fill in automatically.
-
If your email service provider is not in the drop-down menu:
-
Type the email server name or IP Address of your email service provider in the Email Server field.
-
Type the port number of your email server in the Port Number field.
NOTE: Locate this information in the email account properties fields in your email application.
-
If your email server supports secure connection mode, select the Always use secure connection check box, or contact your Internet Service Provider.
-
-
-
If your email server requires authentication for sending emails:
-
Select the The email server requires authentication for outgoing email check box.
-
Type the User ID and Password for your email account.
-
-
If you want to limit who uses your profile (that appears on the printer LCD) to send scans:
-
If you want a copy of all email messages, select the Copy sender for all email messages sent from the printer check box.
-
Click Test Profile to confirm that the printer can access your account.
-
If the printer can access your account, "Test profile: Successful" appears. Click OK, then click Save.
-
If the printer cannot access your account, "Test Profile: Failed" appears. Click OK, then make changes to your profile.
-
Setting up the email address book
-
Open the Online Printer Management Tool (see Accessing the Online Printer Management Tool).
-
Select the Settings tab.
-
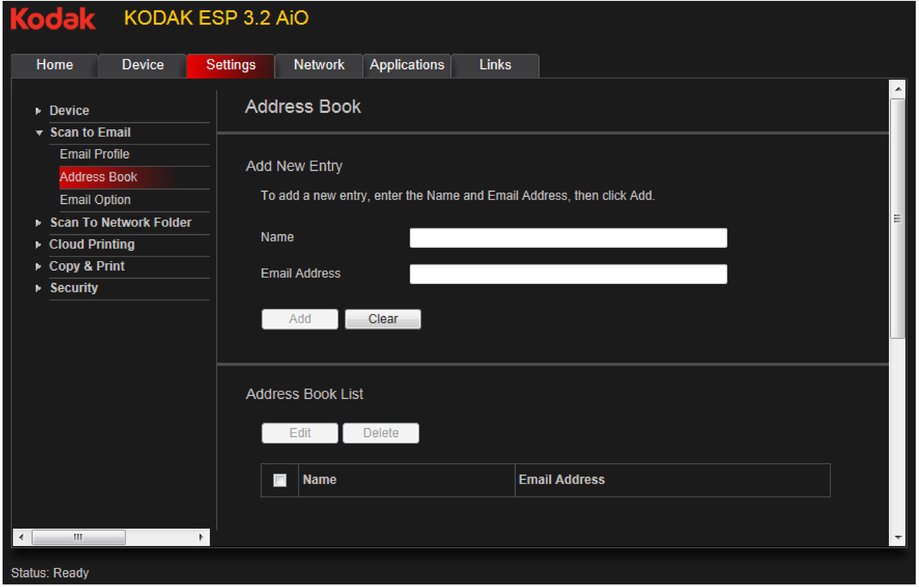
Select Scan To Email > Address Book.
-
For each person:
-
Type the person's Name.
-
Type the person's Email Address.
-
Click Add.
-
-
When you are finished adding email addresses, click OK.
Setting options for scan to email
When you send a scan to an email address, the printer uses the defaults — subject line, body, and scan settings — that you set up under email options.
-
Open the Online Printer Management Tool (see Accessing the Online Printer Management Tool).
-
Select the Settings tab.
-
Select Scan To Email > Email Option.

-
Select and replace the default subject line and body text, if necessary.
This subject line and body text will be included with every scan you send to an email address.
-
Select the scan settings that will be used for all scans sent to email:
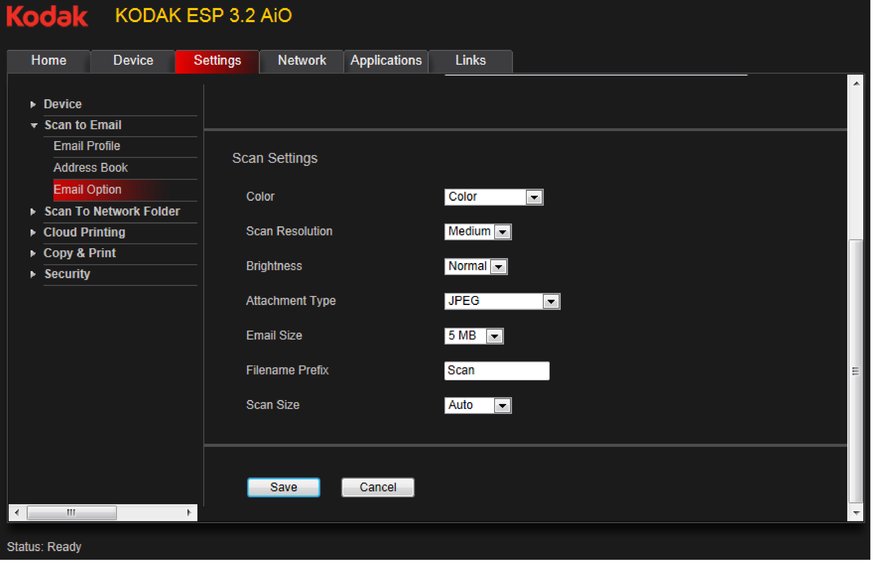
NOTE: You can enter a Filename Prefix of your choice.
-
Click Save, then click OK.
You can now send a scan to an email address from the control panel. See Scanning from the control panel.
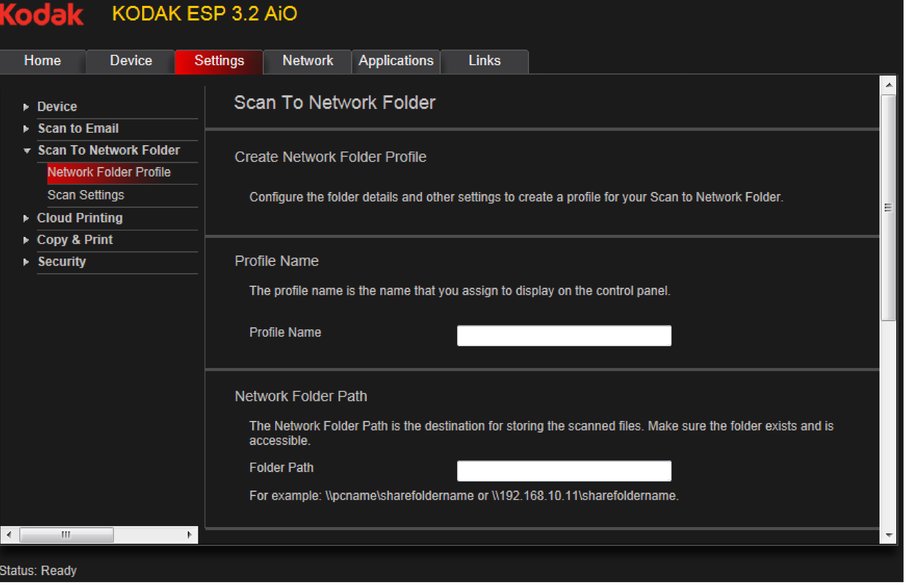
Setting up Scan To Network Folder
You can scan documents or photos directly to a file in a shared folder on your network.
Before you create a network folder profile
You must identify or create a network shared folder on a computer connected to the same network as your printer before you can create a network folder profile. Note the network name of the folder, including the path information, and the name of the computer where it is located. To learn more about sharing folders, see the information in the links below.
-
For computers with WINDOWS XP OS, see
www.microsoft.com/windowsxp/using/networking
/maintain/share.mspx -
For computers with WINDOWS VISTA OS, see
technet.microsoft.com/en-us/library/bb727037.aspx -
For computers with WINDOWS 7 OS, see
windows.microsoft.com/en-US/windows7/File-sharing-essentials -
For computers with MAC OS 10.5 or later, see support.apple.com/kb/ht1549
Adding a network folder profile
-
Open the Online Printer Management Tool (see Accessing the Online Printer Management Tool).
-
Select the Settings tab.
-
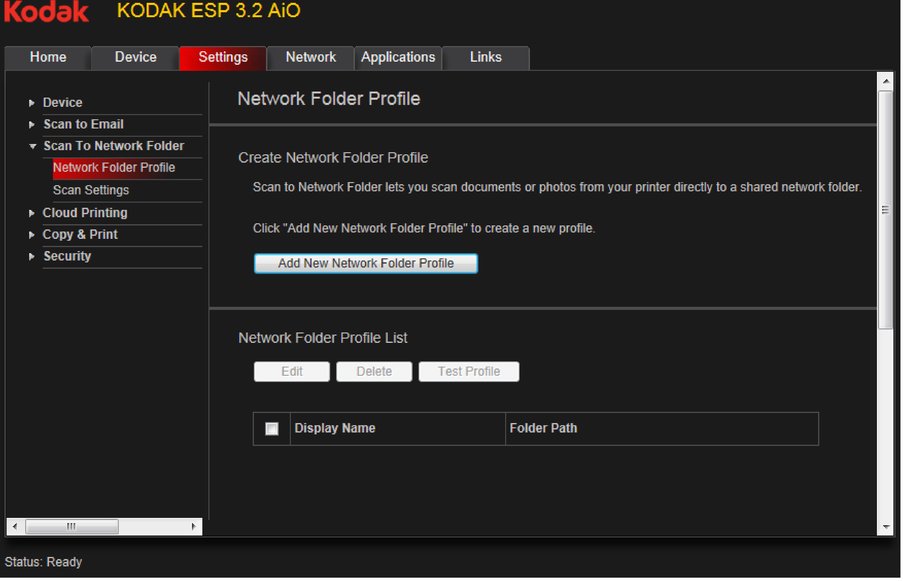
Select Scan To Network Folder > Network Folder Profile.
-
Click Add New Network Folder Profile.
-
Type:
-
Profile Name
-
Folder Path
-
-
If the computer where the folder is located requires authentication to access its shared folders, type the network login User Name and Password.
-
If you want to limit who uses your profile to scan documents to your network folder:
-
Select the Enable Access PIN check box.
-
Type a 4-digit numeric PIN (your choice). You will need to enter this PIN each time you access your profile when scanning to a network folder.
-
-
Click Test Profile to confirm that the printer can access the network folder.
You are now ready to scan a document or photo to your network folder from the control panel. See Scanning from the control panel.
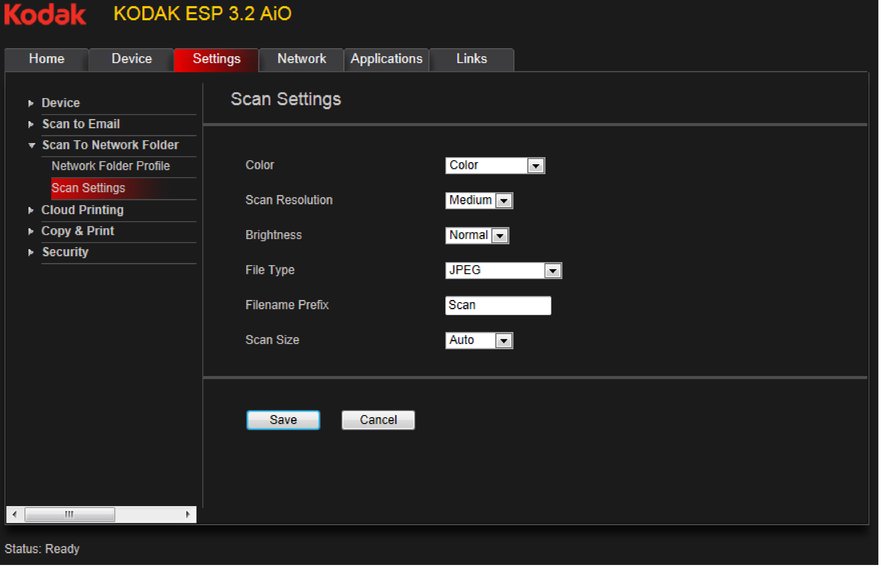
Setting scan settings for scan to network folder
When you send a scan to a network folder, the printer uses the defaults that you set up under scan settings.
-
Select Scan To Network Folder > Scan Settings.
-
Select the scan settings that will be used for all scans sent to a network folder:
NOTE: You can enter a Filename Prefix of your choice.
-
Click Save, then click OK.
You can now send a scan to a network folder from the printer control panel. See Scanning from the control panel.
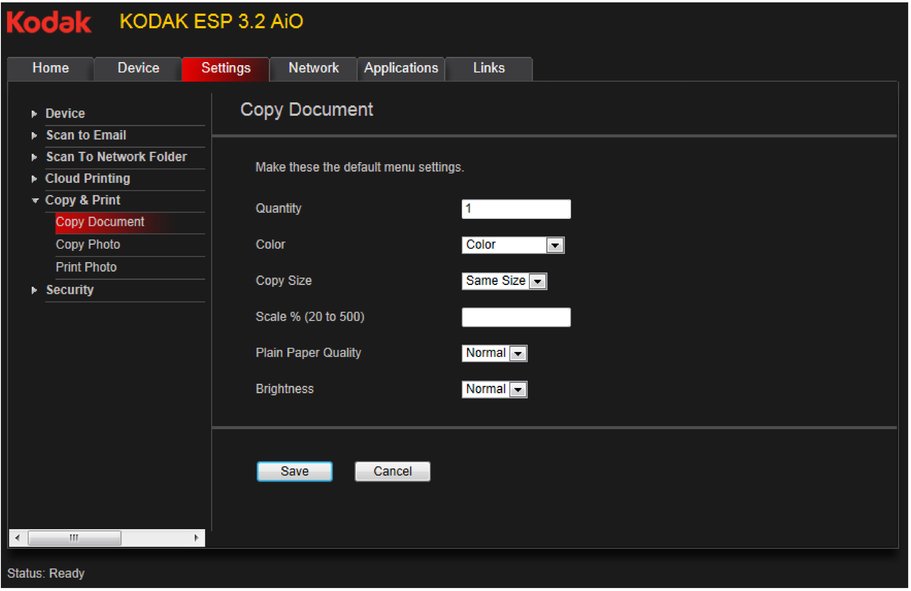
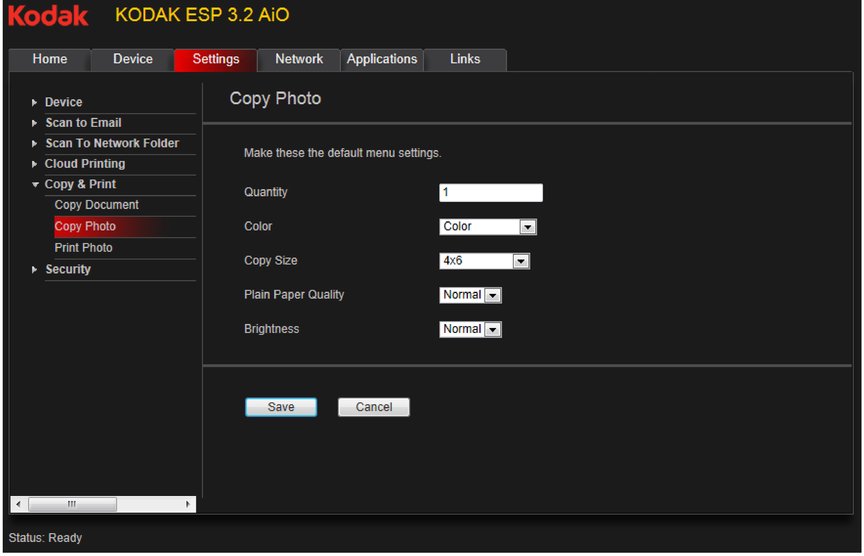
Changing printer settings for copying and printing
You can change the default printer settings for copying documents and photos, and for printing photos.
Changing Copy Document and Copy Photo settings
-
Open the Online Printer Management Tool (see Accessing the Online Printer Management Tool).
-
Select the Settings tab.
-
Select Copy & Print > Copy Document or Copy Photo.
-
Make the changes you want in the appropriate fields, then click Save.
Changing Copy Document and Copy Photo settings (continued)
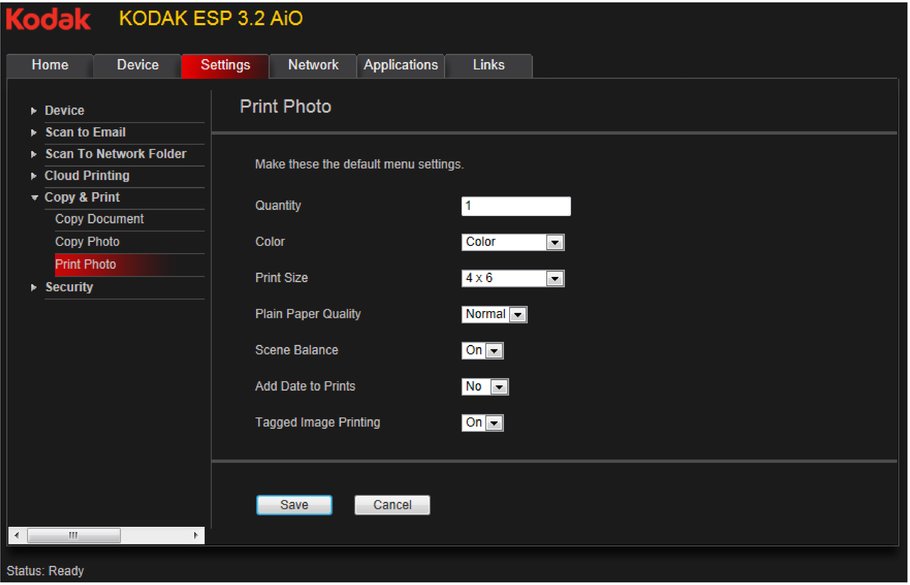
Changing Print Photo settings
-
Open the Online Printer Management Tool (see Accessing the Online Printer Management Tool).
-
Select the Settings tab.
-
Select Copy & Print > Print Photo.
-
Make the changes you want in the appropriate fields, then click Save.
Previous Next