Kodak EasyShare printer dock series 3 — User's Guide
Table of Contents > Getting started > Installing and removing the color cartridge
1 Getting started
Installing and removing the color cartridge
|
|
|
|
|
||
|
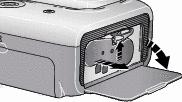
1.
Open the cartridge door on the side of the printer dock.
|
|||||
|
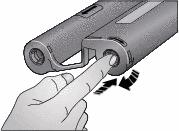
2.
Check to make sure there is no slack in the color cartridge ribbon.
To remove slack, push in on the cartridge spool, then rotate the spool clockwise.
|
||||
|
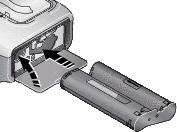
3.
Slide the color cartridge in, label side up, with the arrow pointing toward the printer dock. Push the cartridge until it "clicks" into place.
|
||||
|
4.
Close the cartridge door.
|
|||||
| IMPORTANT: | The color cartridge may lock in place if there is a paper error. Do not attempt to remove the cartridge without first clearing the paper error. Make sure the Paper light is off before attempting to remove the cartridge (see Paper light under Printer dock status lights). |
|
|
|
|
|
|
To remove the color cartridge, open the color cartridge door, then push up on the green lever and slide the cartridge out. |
||
|
|
|
|
|

|
|
||
|
|||
Previous Next