Kodak EasyShare printer dock plus series 3 — User's Guide
Table of Contents > Getting started > Installing and removing the paper tray
1 Getting started
Installing and removing the paper tray
|
|
|
|
|
||
|
1.
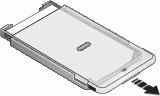
From the closed position, slide the paper tray cover partway back, about 1.2 in. (3 cm) to the first "click". This is the semi-open, or installation position.
|
||||
|
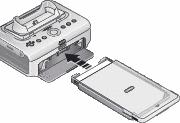
2.
Open the paper tray door on the printer dock.
|
|||||
|
3.
Slide the paper tray in the printer tray slot until the tray locks into place.
|
||||
-
Pull the paper tray out to remove it.
-
Close the paper tray cover and paper tray door to keep out dust and debris.
-
When the paper tray is empty, the Paper light glows red. Load paper (see Loading paper).
After refilling and installing the paper tray, press the Print button,
 , to clear the paper error and resume printing.
Previous Next