Kodak EasyShare Z1275/Z1285 digital camera — Extended user guide
Table of Contents > Taking pictures/videos > Taking a picture
2 Taking pictures/videos
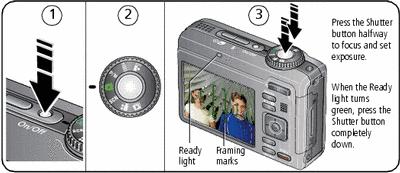
Taking a picture
| NOTE: | Press  to turn on/off status icons (Understanding the picture-taking icons) and histogram (Using the histogram to view picture brightness). For more information on framing marks, Using the framing marks to take pictures. to turn on/off status icons (Understanding the picture-taking icons) and histogram (Using the histogram to view picture brightness). For more information on framing marks, Using the framing marks to take pictures. |
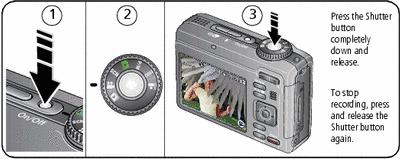
Taking a video
Reviewing the picture/video just taken
After you take a picture/video, the LCD displays a quickview for several seconds. (To dismiss the quickview sooner, press the Shutter button halfway.)
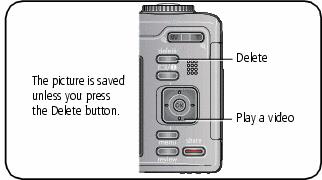
To review pictures/videos anytime, see Reviewing pictures/videos.
Using the framing marks to take pictures
Framing marks indicate the camera focus area. The camera attempts to focus on foreground subjects, even if they're not centered in the scene.
-
Press the Shutter button halfway.
When the subject is in focus, the framing marks turn green. If the camera is not focusing on the desired subject (or if the framing marks disappear), release the Shutter button and recompose the scene.
-
Press the Shutter button completely down to take the picture.
| NOTE: | Framing marks do not appear in some SCN (scene) and Video modes. When you use AF Zone and set Center Zone (
 ), the framing marks are fixed at Center Wide.
 |
Previous Next