Kodak ESP 5 All-in-One Printer — User Guide
Table of Contents > Maintaining Your Printer > Replacing the printhead
7 Maintaining Your Printer
Replacing the printhead
If your printhead is damaged or broken, you may replace it yourself.
-
Make sure your printer is turned on.
-
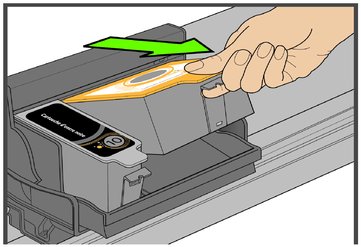
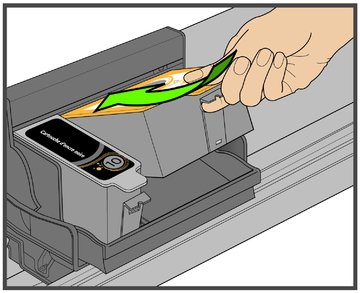
Pinch the latch on the ink cartridge with your thumb and forefinger and lift it out of the print head. Remove both ink cartridges.

CAUTION:
Insert the ink cartridges into the newly installed printhead as soon as possible to prevent any drying of the ink.The printhead moves to an accessible position for handling the ink cartridges. The ink cartridges are seated in the printhead.
-
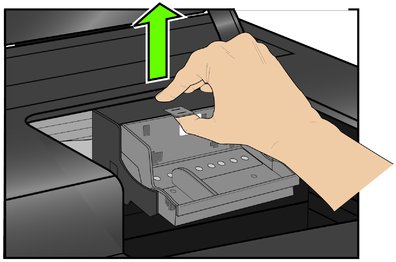
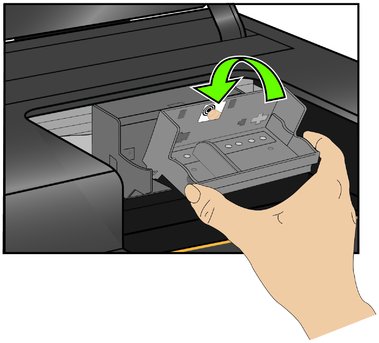
Unlatch the printhead by pressing the release on the top of the carriage.
-
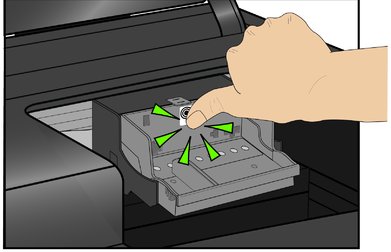
Remove the old printhead from the carriage.

-
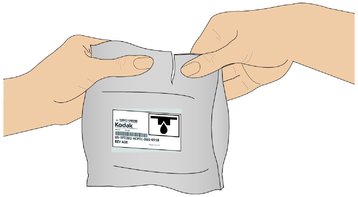
Remove the new printhead from its bag.
CAUTION:
Do not touch copper contacts on the printhead, as this may damage it. -
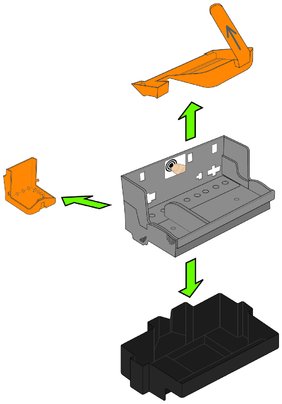
Remove and discard the black plastic casing and the orange protective cap.
-
Place the new printhead into the carriage.
-
Push firmly against the target label on the printhead until you hear it click into place.
-
Re install the ink cartridges.
IMPORTANT: Listen carefully during this step; make sure you hear the ink cartridges click into place in the printhead. This seats the cartridges properly, and prevents ink from being dispensed incompletely on your print or copy jobs.
-
Close the printer access door.
-
The printer will require a calibration after installing a new printhead. Follow the prompts on your printer's display screen.
Previous Next