-
Install the Printhead & Ink Cartridges
Scroll down using the scroll bar on the right or the scroller on your mouse to read each step.
Turn the printer on, if necessary.
Lift the printer access door.
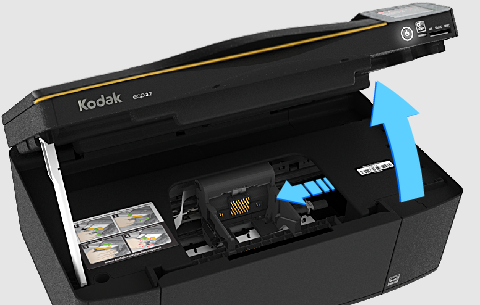 NOTE: Your printer may look different.
Wait for the carriage to move to the access position.
Remove the printhead from the
bag, and remove the plastic protective cap.
Click the arrow to start the video.IMPORTANT: Do not touch the copper-colored contacts or the bottom of the printhead.
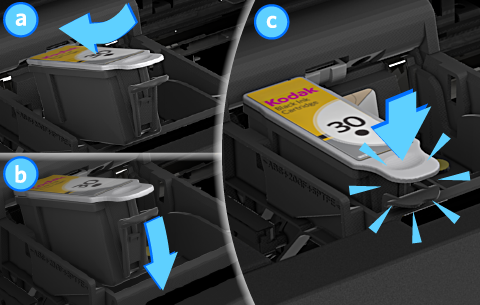
Place the printhead into the
carriage.
Click the arrow to start the video.Press firmly against the target label on the printhead until you hear a loud click.
Remove the cap from the ink cartridges.
Insert the black ink cartridge into the printhead. Press down on the ink cartridge until you hear a click.
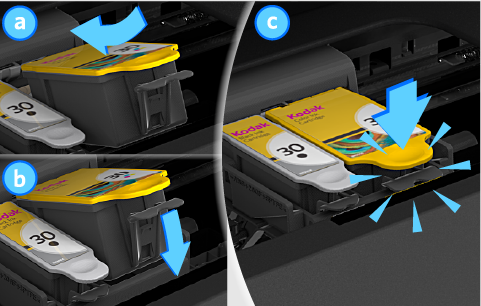
Repeat for the color ink cartridge.
Close the access door.
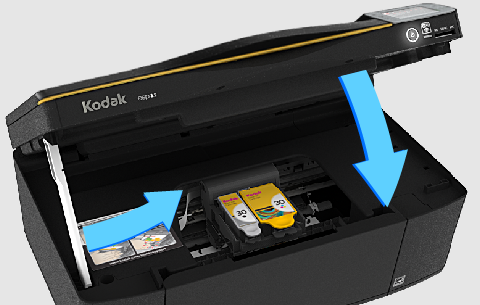
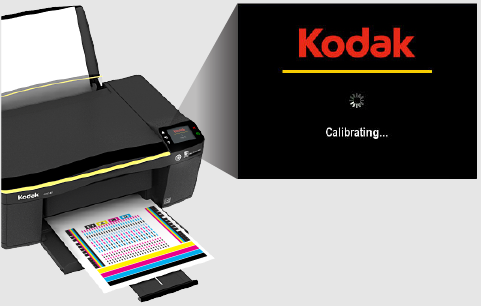
NOTE: Your printer may look different.The printer detects the new printhead. Follow the instructions on the control panel to calibrate your printer.
NOTE: If you have not yet loaded paper, see the tutorial "Load the Paper".
-
Load the Paper
Scroll down using the scroll bar on the right or the scroller on your mouse to read each step.
Lift the input tray.
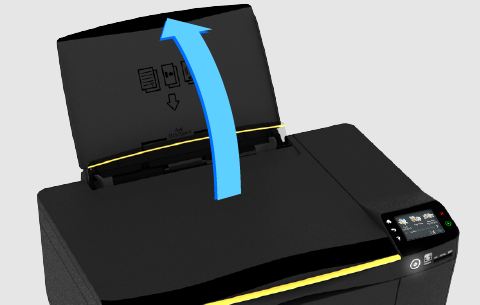
NOTE: Your printer may look different.Make sure your printer is on.
Open the output tray.

NOTE: Your printer may look different.Pull out the extender until it is fully extended.
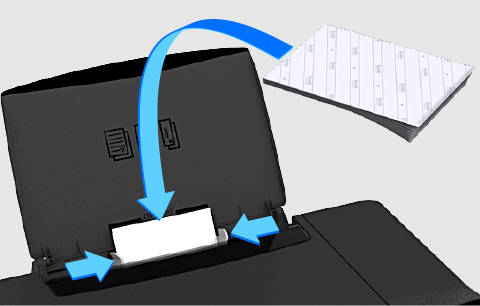
Fan and stack the paper.
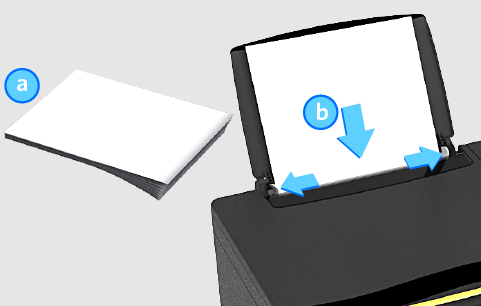
NOTE: Your printer may look different.Make sure the paper-edge guides are in the far left and far right positions. Insert the paper into the input tray.
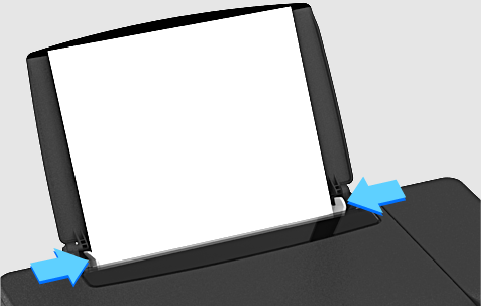
How do I load photo paper?Move the paper-edge guides until they touch the paper.
NOTE: Your printer may look different.
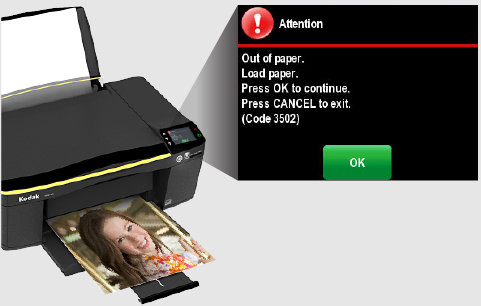
Touch OK to resume printing.
NOTE: Your printer may look different.If you have just installed a new printhead, calibration is necessary. Follow the instructions on the control panel to calibrate your printer.
-
Wireless Networking Requirements
Scroll down using the scroll bar on the right or the scroller on your mouse to read each step.
Wireless network components
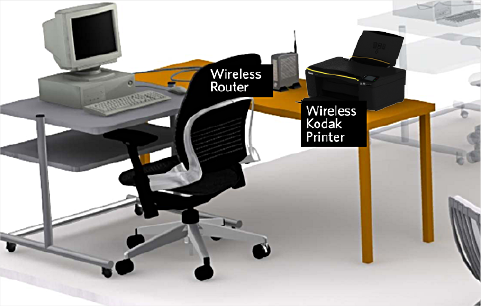
For wireless printing, you must have these components in your wireless network:
- Wireless printer
- Wireless router that supports multicast protocol
To print or scan from a computer, you will need printer drivers by installing the All-in-One Printer Home Center Software.
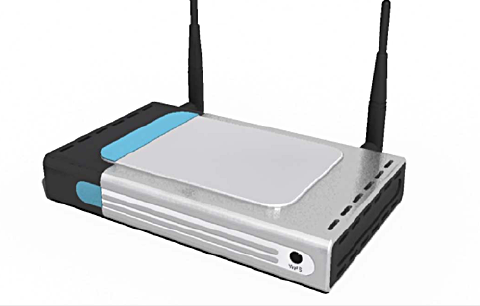
To print from a wireless mobile device, go to www.kodak.com/go/mobile.Wireless Router

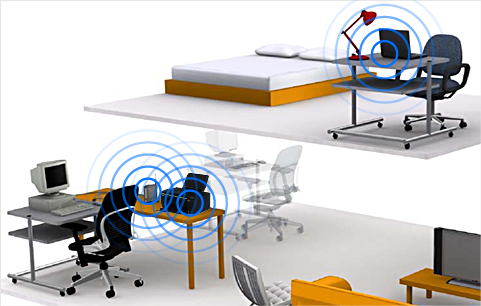
In a typical home network, the router sends and receives radio waves to and from wireless printers, computers, and other wireless devices, allowing them to communicate with each other through the router.
The printer driver allows the computer to communicate with the printer via the router.
IMPORTANT: If you want to use the printer wirelessly, you must have a wireless router (802.11 b/g/n).The End
That is all you need to know at this point.
As you view the tutorial, we'll define other terms as they are used.
Note: If your printer has WiFi Direct capability and you would like to setup connection as WiFi Direct, refer to your printer extended user guide or go to www.kodak.com/go/wifidirectsetup for instructions.
-
Connect Your Printer
Scroll down using the scroll bar on the right or the scroller on your mouse to read each step.
Re-installation or First-time installation?

If you have previously set up the printer and installed the software, and want to change your printer connection type, or you are having trouble getting your computer to communicate with your printer:
Re-installationFor a first-time installation, go to step 2 below.
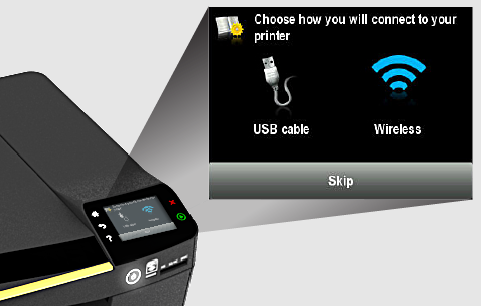
Choose your Connection

Before you install the printer software, choose how you will connect to your printer.
Wireless (click for more information) USB Cable (click for more information)NOTE: Touch SKIP if you will connect your printer at a later time.
For information about connecting your printer, see the Extended User Guide for your printer; go to www.kodak.com/go/aiomanuals.
See the demo "Install the Software" to install the software.
Follow the on-screen instructions to complete your setup.
-
Set Up Your Wireless Printer
Scroll down using the scroll bar on the right or the scroller on your mouse to read each step.
Connecting to a WPS Wireless
Router
If you are using a WPS (Wi-Fi Protected Setup) Wireless router, click this link for the setup steps:
With WPS, you do not need your SSID or Security string.
Setting up with a WPS Wireless RouterIf your router is not WPS Wireless, go to step 2 below.
Connecting to a Non-WPS Wireless Router
You will need your wireless router settings:
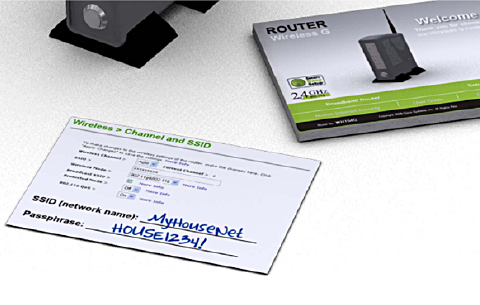
What are SSID and Security string? Security string examples
- Network Name (SSID)
- Security string (case-sensitive)If you have already set up your printer, do these 2 steps first:
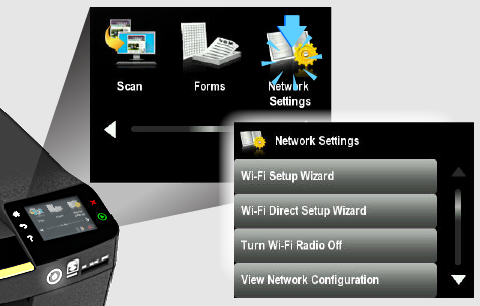
1. Touch Network Settings.
2. Touch WiFi Setup Wizard.If this is the first time setting up this printer:

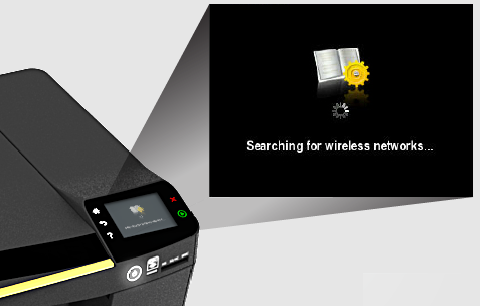
Touch Wireless.
Touch your wireless network from those listed.
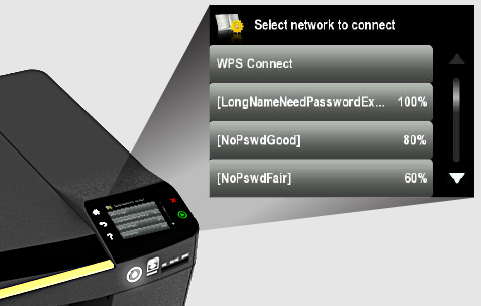
You may need to scroll down to see the entire list.
The network name (SSID) is not listedEnter Security String
If your network has security, this screen will appear.
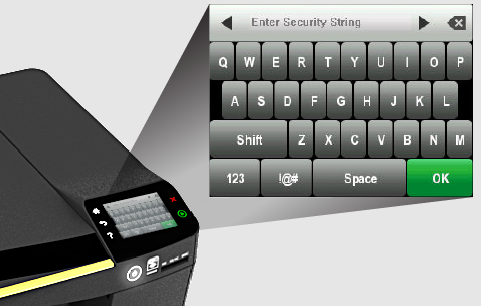
Using the virtual keyboard SSID and Security string examples
Enter your Security string, touch OK. Security string is case-sensitive.Successful connection
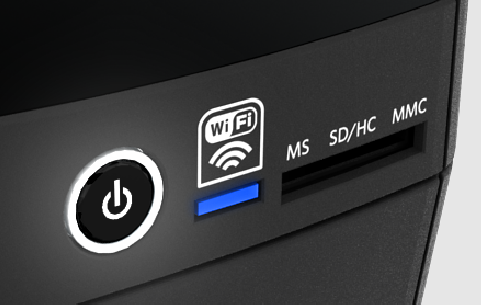
If successfully connected, your WiFi indicator should be solid blue.
Install the software and follow the on-screen instructions to complete your setup. See demo "Install the software" for details. If you have installed the software before connecting to your network, select Start > Programs > Kodak > Kodak Printer Setup Utility from the WINDOWS Start menu. (For computers with MAC OS, see the printer User Guide.)
If you are unable to connect to your wireless network (WiFi indicator is blinking), go to www.kodak.com/go/inkjetnetworking for troubleshooting.
-
Install the Software
Scroll down using the scroll bar on the right or the scroller on your mouse to read each step.
BEFORE INSTALLING THE SOFTWARE
Before you install the printer software, you need to have chosen the connection type.
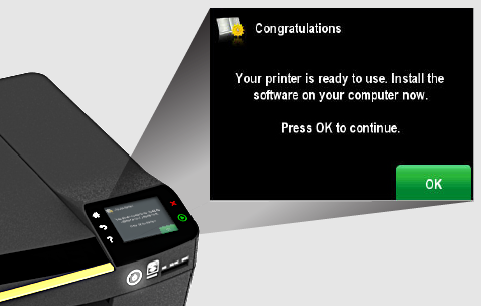
If you haven't done this yet, refer to the "Connect Your Printer" tutorial.Installing the Software
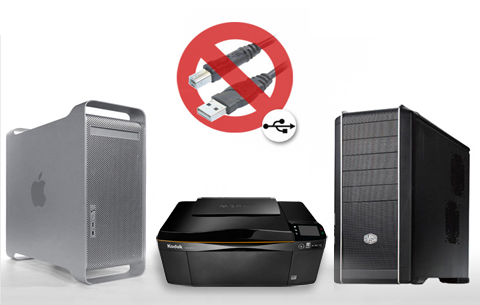
You may use your printer with a PC (WINDOWS) or a MAC. This demo shows using a PC. Refer to the printer instructions on how to connect to a MAC.
Important: Do not connect the USB cable to the printer until instructed to do so.Load the All-in-One Printer Software CD into the CD drive.
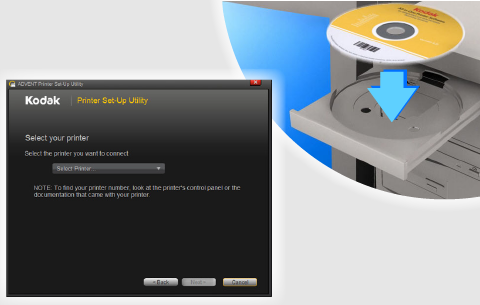
Follow the on-screen instructions.
If the installation window does not appear on your computer screen:
Click Start > Computer, or My Computer, then double-click the CD drive, then double-click setup.exe.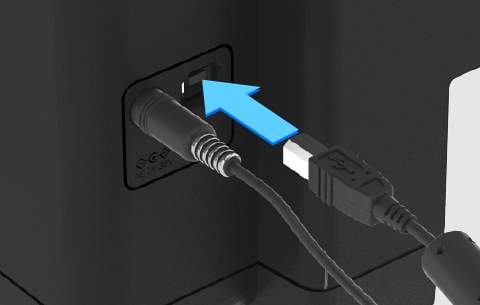
If you choose to connect your printer via USB, when prompted, connect the USB cable to the USB port on the back of your printer and to your computer.
Complete the installation.
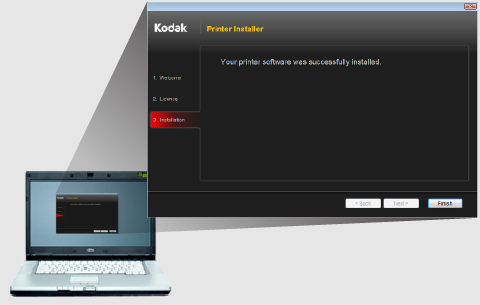
Follow the on-screen instructions until the software installation is complete.
If you are prompted by your firewall during software installation, be sure to allow access.
If you have additional computers on your network, install the All-in-One Printer Software on each computer.Enable Google Cloud Printing*
Go to www.kodak.com/go/cloudprintingsetup.Follow the procedure for setting up your printer for Cloud Printing.
*A GOOGLE Account is required. Device and printer must be connected to the Internet. Subject to service availability.
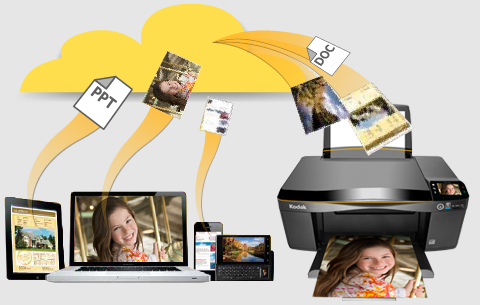
Print from anywhere! Print from your smartphone, tablet, or computer using GOOGLE Cloud Print™ enabled apps. Send documents to your printer using KODAK Email Print Service and any email account.Helpful Links
www.kodak.com/go/aiosupport: find answers and resources. Use Search or select a support category.
www.kodak.com/go/aiotroubleshooting: find help for hardware issues.
www.kodak.com/go/aiodownload: find the latest software and firmware.
To load photo paper
NOTE: Your printer may look different.
Remove any paper from the tray.
Insert the paper (short side first) into the center of the input tray with the logo side toward the tray and the glossy side toward you.
IMPORTANT: If the photo paper is loaded the wrong way, print quality will be affected.
Re-installation (1/2)
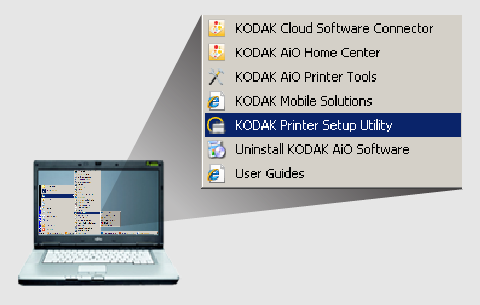
1. Select Start > Programs > Kodak > Kodak Printer Setup Utility from the WINDOWS Start menu.
(For computers with MAC OS, see the printer User Guide.)
Re-installation (2/2)
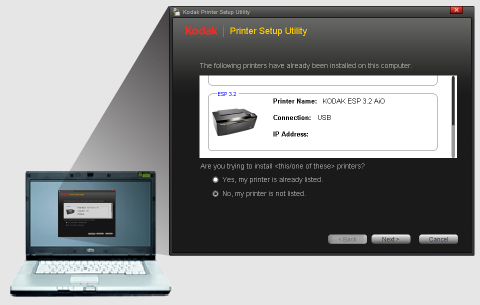
2. Follow the on-screen instructions.
See the Demo "Set Up Your Wireless Printer" if you are changing connection type to Wireless.You are done with this tutorial.
USB Cable Connection
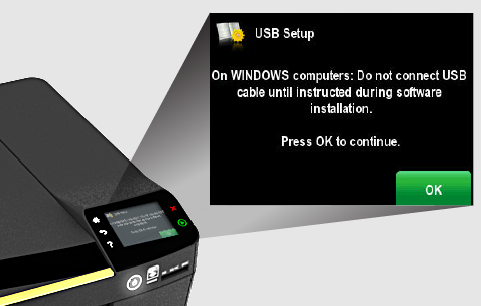
Touch "USB cable" on the display, but do not connect the USB cable to the printer until you are instructed to do so during software installation.
(For computers with MAC OS, see the printer User Guide.)
Skip
Choosing "Skip" during this step allows you to connect your printer at a later time.
Touch "Skip" on the display.
Wireless Connection

Touch "Wireless" on the display.
See the demo "Set up your wireless printer" for details.
Setting up with a WPS Wireless Router (1/7)

If you have already set up your printer, do these 2 steps first:
1. Press Home, then touch Network Settings.
2. Touch WiFi Setup Wizard.
Setting up with a WPS Wireless Router (2/7)
If this is the first time setting up this printer:
Touch Wireless.
Setting up with a WPS Wireless Router (3/7)
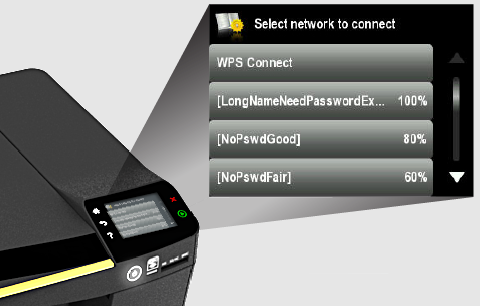
Touch WPS Connect.
Setting up with a WPS Wireless Router (4/7)
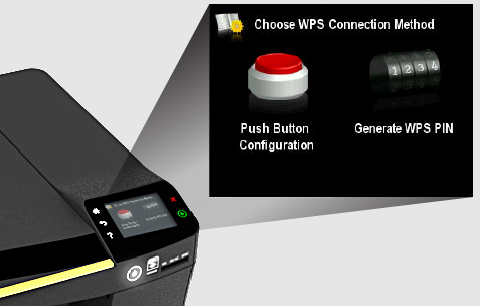
Touch Push Button Configuration or Generate WPS Pin on the LCD display.
Setting up with a WPS Wireless Router (5/7)
If you chose Push Button Configuration:
1. Touch Push Button Configuration.
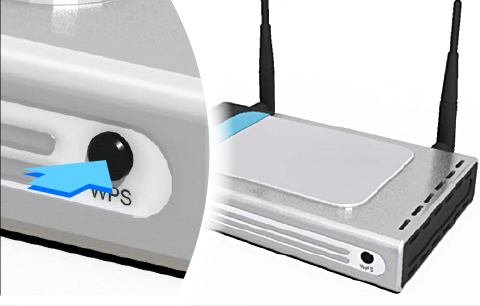
2. You will have two minutes to push the WPS button on your router (this may either be a physical button on the router, or a virtual button in the router's software).
Setting up with a WPS Wireless Router (6/7)
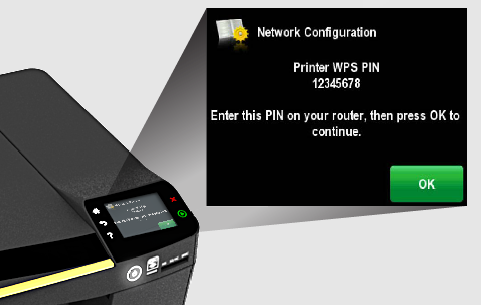
If you chose Generate WPS PIN:
1. Touch Generate WPS PIN.
Go to your router's software and locate the PIN screen. (Refer to your router's Web page for more information about WPS PIN.)
2. Enter the PIN you received from the LCD display into the PIN screen of your router.
Setting up with a WPS Wireless Router (7/7)

When the confirmation message appears, touch OK.
If successfully connected, your Wi-Fi indicator light should be solid blue.
Install the software and follow the on-screen instructions to complete your setup. See demo "Install the software" for details. If you have installed the software before connecting to your network, select Start > Programs > Kodak > Kodak Printer Setup Utility from the WINDOWS Start menu. (For computers with MAC OS, see the printer User Guide.)
If you are unable to connect to your wireless network (WiFi indicator is blinking), go to www.kodak.com/go/inkjetnetworking for troubleshooting.
What are SSID and Security string?

Wireless devices need to know the SSID and Security string to connect to a wireless router.
They are entered at the time you connect to your wireless network. Routers come with a default SSID and Security string (see the manufacturer's documentation).
It is a good idea to change the settings and store the new settings in a safe location. Choose a network name that is unique, so you will recognize it when browsing visible networks.
Check your router documentation, or ask the person who set up your router/network for these settings.
If you cannot find your SSID or security string, go to the router manufacturer's web site for instructions.
Security string examples

Security string: the key string for security purposes using WEP, WPA, WPA2.
Two types of Security strings:
1) A string of ASCII characters from 8-63 characters.
(Example: "This is my house keep out of my network !")
2) PassKey for WEP encryption, which is either:
WEP64:
- 10 characters [numbers from 0 to 9 and letters from A to F]
(Example: "BEEF123456")
- 5 ASCII characters
(Example: "HOUSE")
WEP128:
- 26 characters [numbers from 0 to 9 and letters from A to F]
(Example: "1234567890ABCDEF1234567890")
- 13 ASCII characters
(Example: "BBSMITHHOUSE1")
The network name (SSID) is not listed (1/7)
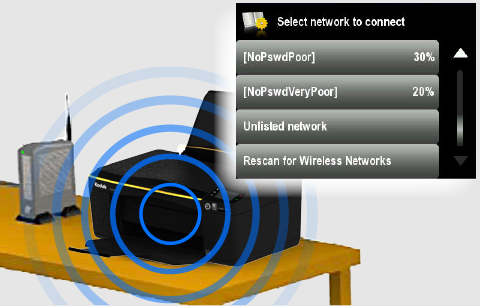
If the network name (SSID) of your network is not listed:
- Touch Rescan for Wireless Networks.
- Make sure your wireless router is turned on and within range.
The network name (SSID) is not listed (2/7)
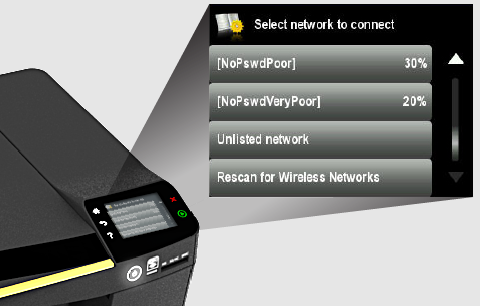
If your router does not broadcast its SSID, touch Unlisted Network.
The network name (SSID) is not listed (3/7)

Enter the network name (SSID), touch OK. Names and passwords are case-sensitive.
See next screen for tips on the virtual keyboard and SSID examples.
Using the virtual keyboard (4/7)

To use the virtual keyboard, touch to select the letter you want.
Touch "X" to clear any mistakes you may make.
Touch "Shift" to switch between capital and lower case.
Touch "123" to switch for number inputs.
Touch "!@#" to switch for symbol inputs.
When you are finished, touch OK.
See next screen for SSID examples.
SSID and Security string examples (5/7)

The format of the SSID and Security string depends on the type of network to which you want to connect.
(Example SSID: MyHouseNet)
Two types of Security strings:
1) A string of ASCII characters from 8-63 characters.
(Example: "This is my house keep out of my network !")
2) PassKey for WEP/WPA encryption, which is either:
WEP64:
- 10 characters [numbers from 0 to 9 and letters from A to F]
(Example: "BEEF123456")
- 5 ASCII characters
(Example: "HOUSE")
WEP128:
- 26 characters [numbers from 0 to 9 and letters from A to F]
(Example: "1234567890ABCDEF1234567890")
- 13 ASCII characters
(Example: "BBSMITHHOUSE1")
Choose Security Type (6/7)

Select the security type for your wireless network.
See next screen for Security Type.
What is Security Type? (7/7)
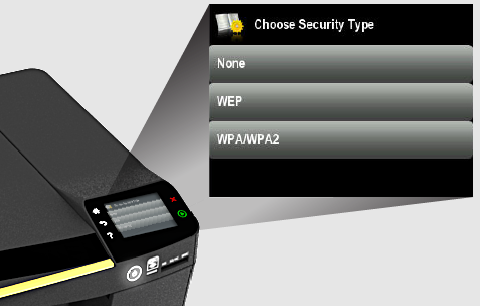
Check your router documentation, or ask the person who set up your router/network for the security type. If you cannot find it, go to the router manufacturer's Web site for instructions.
Using the virtual keyboard
To use the virtual keyboard, touch to select the letter you want.
Touch "X" to clear any mistakes you may make.
Touch "Shift" to switch between capital and lower case.
Touch "123" to switch for number inputs.
Touch "!@#" to switch for symbol inputs.
When you are finished, touch OK.
Enable Cloud Printing
Go to www.kodak.com/go/cloudprintingsetup for information on setting up your printer for Cloud Printing.
Once your printer is setup, you can print from anywhere with your smartphone or computer using GOOGLE Cloud Print enabled apps, and send documents to your printer using any email service with KODAK Email Print.