Kodak EasyShare-One zoom digital camera — User's guide
Table of Contents > Synchronizing and transferring to a computer > Installing the software
7 Synchronizing and transferring to a computer
Installing the software
|
|
|
|
|
||||
|
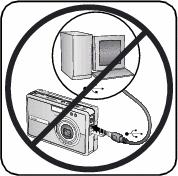
1.
Close all software applications that are open on your computer (including anti-virus software).
|
||||||
|
2.
Place the Kodak EasyShare software CD into the CD-ROM drive.
|
|||||||
|
4.
Follow the on-screen instructions to install the software.
|
|||||||
|
5.
Restart the computer if prompted. If you turned off anti-virus software, turn it back on. See the anti-virus software manual for details.
|
|||||||
|
6.
Continue to follow the on-screen instructions. When prompted, enter your KODAK EASYSHARE Gallery account information or create a new account. Providing this information lets you take advantage of many wireless features of your camera.
|
|||||||
Previous Next