Kodak EasyShare V550 zoom digital camera — User's guide
Table of Contents > Doing more with your camera > Running a slide show
4 Doing more with your camera
Running a slide show
Use the Slide Show to display your pictures and videos (with sound).
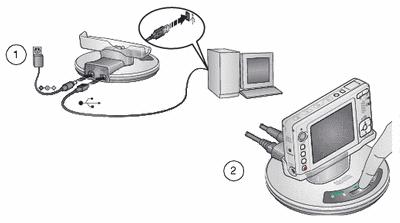
| NOTE: | If you have an EasyShare photo frame dock 2, see Running a slide show with the EasyShare photo frame dock 2. |
Starting the slide show
-
Press the Review button, then press the Menu button.
-
Press
 to highlight Slide Show
  , then press the OK button.
 -
Press
Each picture and video is displayed once. to highlight Begin Show, then press the OK button.
To interrupt the Slide Show, press the OK button.
Changing the slide show display interval
The default interval setting displays each picture for 5 seconds. You can set the display interval from 3 to 60 seconds.
-
On the Slide Show menu, press
 to highlight Interval, then press the OK button.
 -
Select a display interval.
To scroll through the seconds quickly, press and hold
 .
. -
Press the OK button.
The interval setting remains until you change it.
Running a continuous slide show loop
When you turn on Loop, the slide show is continuously repeated.
-
On the Slide Show menu, press
 to highlight Loop, then press the OK button.
 -
Press
The slide show repeats until you press the OK button or until battery power is exhausted. The Loop feature remains until you change it. to highlight On, then press the OK button.
Choosing a slide show transition
-
On the Slide Show menu, press
 to highlight Transition, then press the OK button.
 -
Press
 to select a transition, then press the OK button.
Running a slide show with the EasyShare photo frame dock 2
Your package may include an EasyShare photo frame dock 2. (To purchase accessories, see www.kodak.com/go/v550accessories.)
Reviewing pictures and videos on a television
You can review pictures and videos on a television, computer monitor, or any device equipped with a video input. (Image quality on a television screen may not be as good as on a computer monitor or when printed.)
| NOTE: | Ensure that the Video Out setting (NTSC or PAL) is correct (see ). |
-
Connect the audio/video cable (may be sold separately) from the camera A/V Out/USB port to the television video-in port (yellow) and audio-in port (white). See your television user's guide for details.
-
Review pictures and videos on the television.
Previous Next