Kodak EasyShare Z885 zoom digital camera — User's guide
Table of Contents > Doing more with your camera > P and M modes
5 Doing more with your camera
P and M modes
Use these modes when you want more control over your camera and pictures.

 to control


| NOTE: | Settings you change in P or M mode apply only to pictures taken in that mode. For example, if you change the Color Mode to Sepia while in P or M mode, you retain the default setting of Color for Smart scene and Scene modes. The settings, including Flash, are maintained for P and M modes—even when you change modes or turn off the camera. Use Reset Camera (see the table that starts on Using the Menu button) to reset P or M mode to its default setting. |
Using exposure compensation with exposure bracketing
In P/M modes, you can use exposure compensation (see Using exposure compensation to adjust picture brightness) in conjunction with exposure bracketing (
 ) to get the best exposure.
| If the exposure compensation is set to: |
And if the exposure bracketing interval is set to 0.3 steps:
|
Then the exposures taken are: |
|---|---|---|
|
0.0 +1.0 –1.0 |
Set the Exposure bracketing in the Capture menu (
|
–0.3, 0.0, +0.3 +0.7, +1.0, +1.3 –1.3, –1.0, –0.7 |
Changing P or M mode settings
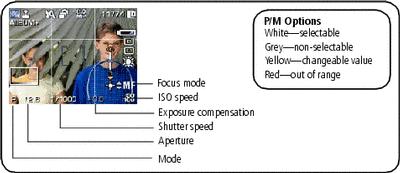
P/M modes control ISO, Focus, exposure compensation, shutter speed, and aperture (f-number, also known as f-stop). Use the Menu button to control all other settings.
-
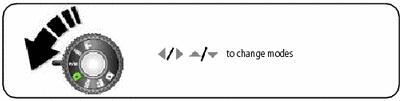
Turn the Mode dial to P/M.
The mode options are displayed.
-
Use
 to move between settings and
  to change the value.
 NOTE: Some settings may be unavailable (see P/M color options above). The  disappears when you cannot make further value changes.
-
Take a picture.
|
|
P/M mode - see P and M modes. |
|
|
ISO speed - adjust the camera's sensitivity to light. Higher ISO indicate greater sensitivity. You can use ISO 6400 and 8000 only when you are in 1.2, 2.1, and 2.2 MP Picture Size setting (
|
| NOTE: | A higher ISO may produce unwanted "noise" in a picture. |
|
|
Exposure Compensation - adjust the exposure; good for controlling backlit or non-standard scenes. If the picture is too light, decrease the setting; if it's too dark, increase the setting. |
|
|
Shutter speed - control how long the shutter stays open. |
|
|
Aperture - (also known as f-stop) control the size of the lens opening, which determines the depth of field.
|
|
|
Focus mode - select a large or concentrated area of focus. |


 to change settings and
  to change the focus mode. When MF icon appears, press OK to display focal length indicator. Press
  to adjust the setting.
 Previous Next