KODAK Theatre HD Player — Extended user guide
Table of Contents > Getting started > Connecting the HD player
1 Getting started
Connecting the HD player
|
|
|
|
|
||
|
1.
Find a location for the HD player where it is not subjected to excessive heat from your home heating system or other electronic devices (e.g., avoid placement directly on top of other devices that generate significant heat).
|
|||||
|
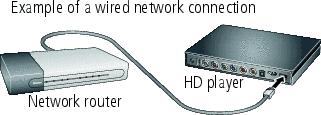
2.
If you are not connecting to your home network wirelessly, connect a shielded Ethernet cable (RJ45, sold separately) from your network router or computer to the HD player. If you have a wireless network, go to step 3.
|
|||||
|
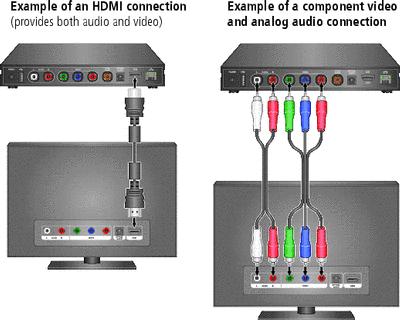
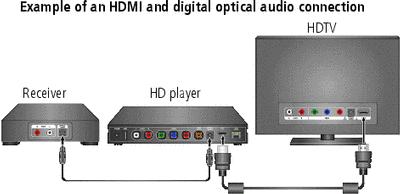
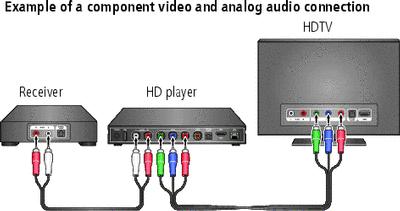
3.
Connect the HD player to your HDTV (or to an HDMI computer monitor). Find the audio and video ports on the back of your TV or receiver; use the appropriate cables for your setup. HDMI or component connections provide a quality experience. Note the HDMI or component inputs used.
|
|||||
|
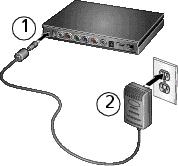
4.
Attach the AC adapter to the HD player and plug it into a wall outlet to turn it on.
|
||||
|
5.
Turn on your TV.
|
|||||
|
6.
Using your TV remote control, select the video input matching the connection you made in step 3. (Refer to your TV owner's manual for more information on changing the video input mode.) It may take a few seconds for the TV mode change to take effect.
The setup wizard appears on your TV screen. |
|||||
|
7.
Use the KODAK Pointer Remote to follow the 9 easy steps on your TV screen for configuring the HD player for your home network.
|
|||||
Previous Next