KODAK HERO 7.1 All-in-One Printer — Extended User Guide
Table of Contents > Copying > Copying a photo
7 Copying
Copying a photo
You can copy a photo using the default settings, or you can make adjustments to the quantity, size, quality, and brightness of your copies. When you copy a photo, the printer will use paper from the top paper tray, unless you specify otherwise.
Using the default settings to copy a photo
The default settings are either the factory default settings (Resetting factory defaults), or defaults that you have set on the printer ().
To copy a photo using the current default settings:
-
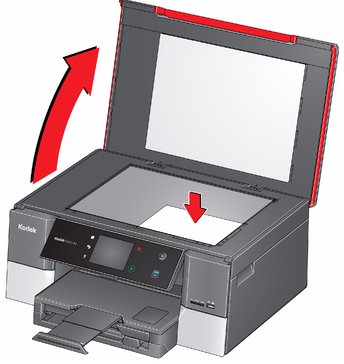
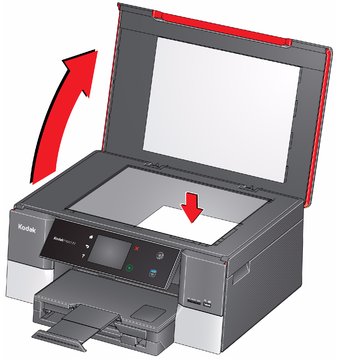
Lift the scanner lid, and place the photo face down in the right-front corner of the scanner glass.
-
Close the lid.
-
Press
 .
. -
Touch Copy Photo.
-
Press
 to begin copying.
Adjusting the settings and copying a photo
-
Lift the scanner lid, and place the photo face down in the right-front corner of the scanner glass.

-
Close the lid.
-
Press
 .
. -
Touch Copy Photo, then touch Options.
-
Touch
 or
or  , then touch the setting you want to change.
 -
Press
 to begin copying.
Changing the number of copies of a photo
-
Lift the scanner lid, and place the photo face down in the right-front corner of the scanner glass.
-
Close the lid.
-
Press
 .
. -
Touch Copy Photo.
-
Touch
 or
or  to select a number.
 -
Press
 to begin copying.
Enlarging or reducing the size of a copy of a photo
-
Lift the scanner lid, and place the photo face down in the right-front corner of the scanner glass.

-
Close the lid.
-
Press
 .
. -
Touch Copy Photo, then touch Options.
-
Touch Copy Size.
-
Touch
 or
or  , then touch a size selection.
 NOTE: If you select a copy size larger than 5 x 7 in. / 13 x 18 cm, touch Tray Selection, then select Bottom Tray. Make sure that the paper in the bottom tray is the size and type (plain paper, photo paper, etc) that you want.
-
Press
 to begin copying.
Darkening or lightening a copy of a photo
-
Lift the scanner lid, and place the photo face down in the right-front corner of the scanner glass.

-
Close the lid.
-
Press
 .
. -
Touch Copy Photo, then touch Options.
-
Touch
 to select a number below zero for a darker copy, or touch
  to select a number above zero for a lighter copy.
 -
Press
 to begin copying.
 , then touch
Previous Next