Kodak EasyShare P880 zoom digital camera — User's guide
Table of Contents > Doing more with your camera > Picture-taking modes
4 Doing more with your camera
Picture-taking modes
| Use this mode | For |
|---|---|
|
|
Mode Switch—Capture and Favorites. |
|
|
Taking pictures and videos. |
|
|
Viewing your favorites (see Tagging pictures as favorites).
|
|
|
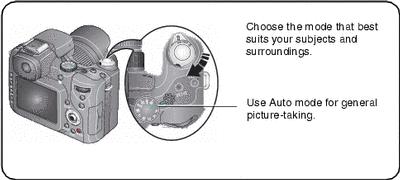
Mode Dial—11 settings. |
|
AUTO
|
General picture-taking—offers an excellent balance of image quality and ease-of-use. |
|
|
Portrait (default)
Anti-shake Night Portrait
|
|
|
Landscape (default)
|
|
Flower (default)
Super Close-up
Use available light instead of flash, if possible. |
|
|
|
Point-and-shoot simplicity when taking pictures under 8 special conditions (see Scene modes). |
|
|
Controlling the exposure compensation, flash compensation (how much light enters the camera), and ISO speed (see Setting the ISO speed). The camera automatically sets the shutter speed and aperture (f-number) based on the scene lighting. Program mode offers the ease of auto shooting with full access to all menu options. Use the Command dial and Set button to select and adjust settings (see Changing PASM or C mode settings). Press the Menu button to change other settings. |
|
|
Controlling the aperture, exposure compensation, flash compensation, and ISO speed (see Setting the ISO speed). Aperture priority mode is primarily used to control depth of field (the range of sharpness).NOTE: The aperture setting may be affected when using optical zoom. Use the Command dial and Set button to select and adjust settings (see Changing PASM or C mode settings). Press the Menu button to change other settings. |
|
|
Controlling the shutter speed, exposure compensation, flash compensation, and ISO speed (see Setting the ISO speed). The camera automatically sets the aperture for proper exposure. Shutter priority mode is primarily used to prevent blur when your subject is moving. To prevent camera shake, use a tripod for slow shutter speeds. Use the Command dial and Set button to select and adjust settings (see Changing PASM or C mode settings). Press the Menu button to change other settings |
|
|
Enjoying the highest level of creative control. You can set the aperture, shutter speed, flash compensation, and ISO speed (see Setting the ISO speed). Exposure compensation acts as an exposure meter, recommending the proper combination of aperture and shutter speed to produce an acceptable exposure. To prevent camera shake, use a tripod for slow shutter speeds. Use the Command dial and Set button to select and adjust settings (see Changing PASM or C mode settings). Press the Menu button to change other settings. |
|
|
A "user-created"mode that lets you save settings in P, A, S, M plus any Custom and menu settings which are saved independent of other camera settings. If you created settings in another mode, you can transfer and save them to any of the C modes using Copy to Custom (see table on PASM and C menu options). |
|
|
Capturing video with sound (see Taking a video ). |

 Capture
  Favorites
 Portrait
  —full-frame portraits of people. Allows the subject to be sharp and the background to be indistinct. For best results, position your subject at least 6 ft (2 m) away and fill the frame with a head and shoulder pose. Use Telephoto to exaggerate background blur. Night Portrait
 —reduces red eye of people in night scenes or low-light conditions. Place camera on a flat, steady surface or use a tripod.
  —minimizes camera shake while capturing both subject and background.
  Landscape
  —distant scenery. Night Landscape
 —distant scenery at night. For both settings, the flash does not fire and auto-focus framing marks (
 Flower
 —sharp pictures at close range. The camera automatically sets the focus distance depending on the zoom position. The close-up distances from the lens are 3.9–19.7 in. (10–50 cm) at Wide angle and 10–19.7 in. (25–50 cm) at Telephoto.
  —sharp pictures at super close range. The close-up distance from the lens is 2–13.8 in. (5–35 cm) at Wide angle. NOTE: Super Close-up is not effective at Telephoto zoom position.
  Scene
Scene
 Program
 Aperture Priority
 Shutter Priority
 Manual
 Custom
  Video
Video Scene modes
-
Turn the Mode dial to Scene
 .
. -
Move
 to display Scene mode descriptions.
 NOTE: If the Help text turns off, press the OK button.
-
Press the OK button to choose a Scene mode.


Previous Next