Kodak EasyShare HDTV dock — User's guide
Table of Contents > Getting started > Setting up your HDTV dock
1 Getting started
Setting up your HDTV dock
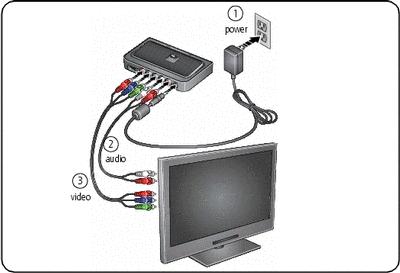
Connecting the dock to your high definition TV
-
Plug in the power cable.
NOTE: Your power cable (included with the dock) may be different from the one pictured. Use the plug that accommodates your type of power outlet.
-
Plug in the audio cable, matching the 2 color-coded connectors on the dock and the television.
-
Plug in the video cable, matching the 3 color-coded connectors on the dock and the television.
Attaching the camera insert
|
|
|
|
|

|
|
||
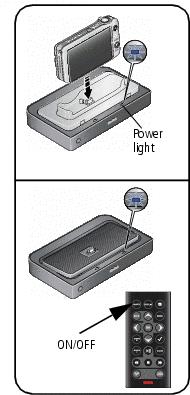
Docking your camera; turning on the dock
|
|
|
|
|
||
|
|
||||
|
|||||
Setting your language
On the remote control:
-
Press MENU.
-
Press
 to highlight Settings, then press OK.
 -
Press
 to highlight Language, then press OK.
 -
Press
 to select your language, then press OK.
Press  to return to the previous screen.
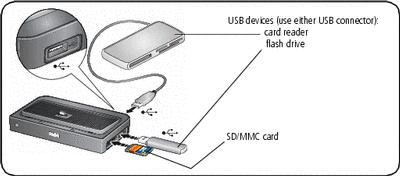
Inserting a card or USB device
You can display pictures from a SD/MMC (Secure Digital/MultiMedia Card), or a removable USB device. There are two USB connectors on the dock, one on the side and one on the back.
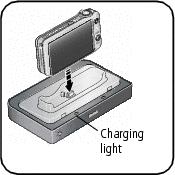
Charging the camera battery
|
|
|
|
|
|
1.
Make sure:
|
||
|
2.
Place the camera on the dock.
Charging begins. Full charging takes up to 3 hours. Charging light: |
|||
|
Blinking green |
Charging |
|
Steady green |
Fully charged |
|
Blinking red |
Error, see Troubleshooting |


Previous Next