Kodak EasyShare HDTV dock — User's guide
Table of Contents > Working with pictures/videos > Viewing pictures and videos
2 Working with pictures/videos
Viewing pictures and videos
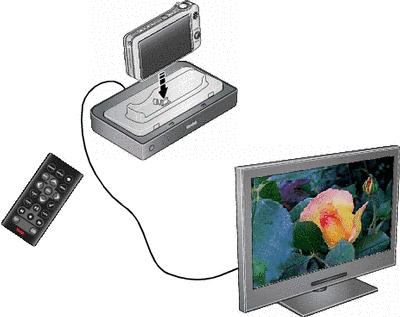
Use your high definition television to view pictures and videos from a docked camera, memory card, or USB drive. (See Inserting a card or USB device for more details.)
-
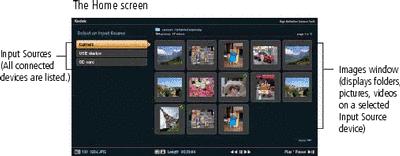
The Home screen displays your pictures and videos as thumbnails.
-
Use the remote control
 and OK buttons to navigate through your pictures/videos and to make your selections.
Accessing the Home screen
-
Connect the dock to your HD television (see Connecting the dock to your high definition TV).
-
Dock your camera. (The dock turns on automatically.)
NOTE: Make sure the camera is set to the appropriate regional format (NTSC or PAL). See your camera user's guide for details.
OR
If your pictures/videos are on a memory card or USB flash drive:
-
insert the memory card or USB flash drive (see Inserting a card or USB device), then
-
press ON/OFF on the remote control to turn on the dock
-
-
Press
The images or image folder(s) appear in the images window. to highlight an Input Source (where your pictures/videos are located), then press OK.
To view folder contents, highlight a folder, then press OK.
To return to the Input Sources list, press BACK.
| NOTE: | Devices connected to the dock are listed as Input Sources. |
Home screen features
|
Input sources |
Pictures, videos and folders are displayed from: |
|
|
The camera that is placed on the dock. |
|
|
A card inserted in the dock memory card slot. |
|
|
A USB device (flash drive, card reader, etc.) inserted in the dock USB connectors. Each device is shown as a separate source. Each card in a card reader is shown as a separate USB device. The device inserted into the side USB connector is shown first. |
 Camera
  SD card
  USB device
 |
Icons on thumbnails |
|
|
|
Video (see Playing a video) |
|
|
Picture has a sound tag (see Playing sound tags) |
|
|
Multimedia slide show (see Running a multimedia slide show) |
|
|
Selected picture/video/folder (see Selecting pictures/videos) |
|
|
View-only pictures/videos selected as Favorites on camera (see your camera user's guide) |


Viewing a single picture/information
-
Press
 on the remote control to locate a picture.
 -
Press OK.
-
Press Display to turn on/off the picture information.
-
Press
 to view previous/next picture in a single, full screen.
 To view pictures automatically in full-screen, press and hold
 for approximately 2 seconds.
To return to the Home screen, press Back or  .
.
Playing sound tags
-
Images associated with sound tags are displayed with the
 icon.
icon. -
In single-picture view, press the Play/Pause button.
-
During sound play, the play time is displayed.
-
Copying or deleting an image also copies and deletes any associated sound tags.
To create sound tags, see your camera user's guide.
Magnifying pictures
|
|
|
|
|
|
1.
In single-picture view, press
 on the remote control to locate a picture. on the remote control to locate a picture. |
||
|
2.
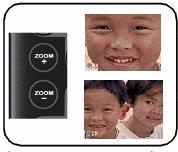
Press the Zoom+ button to magnify 2X–4X.
|
|||
|
3.
Press
 to view other parts of the picture. to view other parts of the picture. |
|||
|
4.
Press the Zoom- button to return to 1X.
|
|||
Cropping pictures
|
|
|
|
|
|
1.
In single-picture view, press
 on the remote control to locate a picture. on the remote control to locate a picture. |
||
|
2.
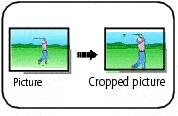
Press the Menu button.
|
|||
|
3.
Press
 to highlight Crop, then press OK. to highlight Crop, then press OK. |
|||
|
4.
Press Zoom+/Zoom- buttons to size the crop box.
|
|||
|
5.
Press
 to move the crop box, then press OK. to move the crop box, then press OK.
You can replace the original picture, or save the cropped picture as a new one in the same location as the original. A new name is assigned to the new picture. |
|||
Rotating pictures
-
In single-picture view, press
 on the remote control to locate a picture.
 -
Press the Menu button.
-
Press
 to highlight a rotation option (Clockwise or Counterclockwise), then press OK.
 NOTE: You can only rotate pictures that are unprotected and are larger than 2.0 MP (see Protecting pictures/videos from deletion).
Previous Next