Kodak ESP 9 All-in-One Printer — User Guide
Table of Contents > Printer Overview > Using the control panel
2 Printer Overview
Using the control panel
Adjusting the control panel position
The position of the control panel can be adjusted from its default position (flush against the front of the printer) to lifted upward at an angle. 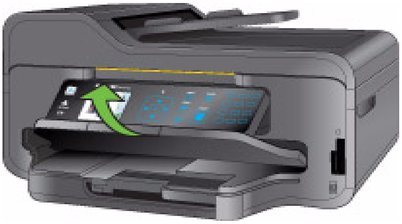
To adjust the control panel position:
-
On the rear side of the control panel, locate the release tab.
-
Press the front of the control panel and the release tab toward each other with your thumb and fingers; maintain this position and pull the control panel toward you gently.
-
When you are satisfied with the position of the control panel, let go.
-
To return the control panel to its default position, squeeze the release tab and gently push the control panel away from you. Let go when the panel is seated against the front panel of the printer.
About the "touch-sense" buttons on the control panel
The ESP 9 All–in–One printer features flat-panel buttons that do not depress when pushed, as in a traditional keyboard or calculator keypad. Each button on the control panel responds to the pressure of your finger and performs a specific action based on the task you are working on.
If this type of interface is unfamiliar to you, it may take a bit of practice getting used to it. You should discover that each button is quite sensitive to touch, and you may find that pressing a key too hard, or accidentally pressing one button several times in a row, may cause errors.
With practice, you will learn the right amount of pressure and the best rate for pressing the keys for using the buttons quickly and easily. 
Using the 4-way navigation buttons
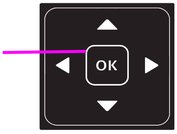
| NOTE: | The OK button is located in the center of the 4-way navigation buttons on the control panel. Its use is described in Using the OK button. |
The 4-way navigation buttons allow you to update the content displayed on the LCD screen.
-
Pressing
 highlights the next row down in the visible menu. When the last row in a menu is highlighted, pressing
  causes the visible page to be replaced with the following page in a multi-page menu, with the top row highlighted; in a one-page menu, this action highlights the top item.
 -
Pressing
 returns you to the previous page in a multi-page menu.
 -
After you have initiated the process of zooming when a photo is shown on the LCD screen, pressing
 or
or  pans the focus up or down. (See Using the Zoom buttons.)
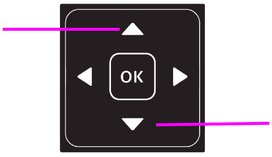

-
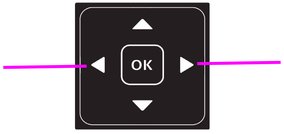
When there are two or more options for the setting shown on the selected menu row, the current value is displayed between the
 and
and  symbols. Pressing
  or
or  on the control panel scrolls through the choices.
-
When a photo is displayed on the LCD screen, after you have pressed the Zoom+ button pressing
 ,
,  moves the focus in the direction you have used.
 NOTE: The Zoom+ and Zoom- buttons on the control panel are discussed in Using the Zoom buttons.
-
When you are viewing a group of photos stored on a portable memory storage device such as a USB drive, pressing the
 or the
  button allows you to scroll through the images.
 -
Continuing to press any of the 4-way navigation buttons causes them to repeat the action until you release it.
Using the OK button
Press OK to:
-
Accept the setting displayed in the selected row in the current menu
-
Accept the preview on the LCD screen of something that you want to print, copy, scan or fax as the content to be produced.
-
Select a photo for printing.

Using the Menu button
Press Menu when:
-
You want to set up a new task and anything other than a menu is visible on the LCD screen.
-
You are viewing an image on the LCD screen and want to use Photo Options menu.
-
You want to view the parent of the last menu displayed.

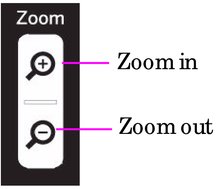
Using the Zoom buttons
Press Zoom+ when an image is displayed on the LCD and you want to adjust the area to be printed, copied, or scanned. When this feature is available, the printer displays a prompt to press Zoom on the image shown on the LCD.
Once you have activated zoom for the selected item, you can then use both the Zoom+ (zoom in) and the Zoom– (zoom out) buttons.
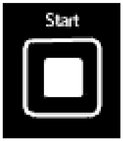
Using the Start button
Press Start to initiate the task you are working on with the current settings.
Using the Cancel button
Press Cancel when:
-
You want to interrupt an operation that has already started.
-
You are viewing a menu that you opened by selecting an option on a different menu, and then decide that you want to view the previous one.

Using the number keypad buttons
The number keypad is used primarily as a resource for sending faxes from the ESP 9 All–in–One printer. It is also used to enter a quantity for making copies.

Use the number keypad to:
-
Dial a fax phone number
-
Enter the Quick Dial number for an entry in the Fax Phonebook
-
Enter the fax telephone number for an entry in the Fax Phonebook
-
Enter a quantity for making copies of a document or photo
As on a telephone dial pad, which the number keypad resembles, each key on the ESP 9 number keypad (except for the 1 key and the zero key) is associated with both a numerical value and with either three or four alphabetic characters, with typographic symbols, or with symbols and a space (used to separate two alphanumeric characters). 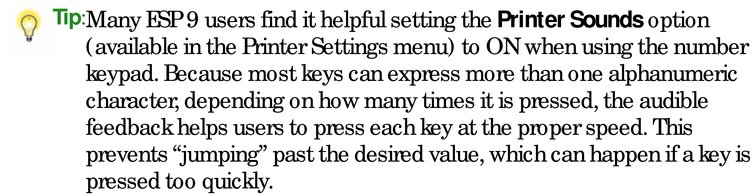
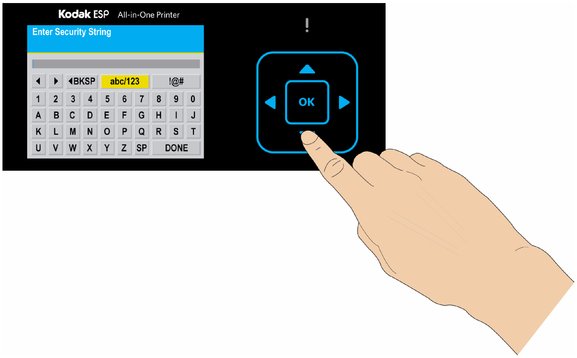
Using the on-screen keyboard
The on-screen keyboard displays in the ESP 9 All-in-One printer LCD for the following tasks performed on the control panel:
-
Entering authentication information, such as a security string, for connecting the printer to a wired (Ethernet) or wireless (Wi-Fi) network, in the Network Settings menu
-
Entering or editing your Fax Sender information in the Fax Settings menu
-
Entering or editing the fax recipient Name in the Fax Phonebook
To maneuver around the on-screen keyboard, use the 4–way navigation buttons, described in Using the 4-way navigation buttons, and the OK button, described in Using the OK button.
Previous Next