KODAK EASYSHARE DX4900 Zoom Digital Camera — User's Guide
Table of Contents > Getting Started > Mode Dial—Settings and Menus
1 Getting Started
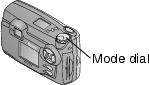
Mode Dial—Settings and Menus
Use the Mode dial to access three ways to use your camera:
|
|
|
|
|
||||
|
|
||||||
 —take pictures and change picture-taking options
 —view and work with your pictures on the LCD screen
 —customize your camera functions
Capture Menus
|
|
|
|
|

|
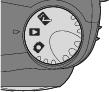
To access the Capture mode menus: | ||
|
1.
Turn the Mode dial to Capture
 . . |
|||
|
2.
Press the Menu button.
|
|||
|
3.
Use the
 arrow buttons to scroll through the menus and submenus. arrow buttons to scroll through the menus and submenus. |
|||
|
4.
Press the Select button.
|
|||
| Menu | Menu | ||
|
|
Exposure Compensation (Setting Exposure Compensation) |
|
Sharpness(Setting Picture Sharpness) |
|
|
White Balance (Setting White Balance) |
|
ISO Speed(Setting the ISO Speed) |
|
|
Color Mode(Setting a Color Mode) |
|
Shutter Speed(Setting the Shutter Speed) |
|
|
Quality (Setting the Picture Quality) |
|
Date and Time Stamp(Placing the Date on Pictures) |
|
|
Exposure Metering (Setting Exposure Metering) |


Review Menus
|
|
|
|
|
|
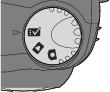
To access the Review mode menus: | ||
|
1.
Turn the Mode dial to Review
 . . |
|||
|
2.
Press the Menu button.
|
|||
|
3.
Use the
 arrow buttons to scroll through the menus and submenus. arrow buttons to scroll through the menus and submenus. |
|||
|
4.
Press the Select button.
|
|||
|
Menu |
Menu |
||
|
|
Magnify |
|
Slide Show |
|
|
Delete |
|
Print Order from card only (Selecting Pictures for Automatic Printing) |
|
|
Protect |
|
Picture Info |


Setup Menus
|
|
|
|
|
|
To access the Setup mode menus: | ||
|
1.
Turn the Mode dial to Setup
 . . The Setup menu screen is displayed on the LCD. |
|||
|
2.
Use the
 arrow buttons to scroll through the menus and submenus. arrow buttons to scroll through the menus and submenus. |
|||
|
3.
Press the Select button.
|
|||
|
Menu |
Menu |
||
|
|
Power Save (Selecting a Power Save Setting) |
|
Language (Selecting a Language) |
|
|
Digital Zoom (Setting Digital Zoom Behavior) |
|
Format Card (Formatting a COMPACTFLASH Card) |
|
|
Camera Sounds (Adjusting the Camera Sounds) |
|
Reset User Setting (Resetting User Settings) |
|
|
Date/Time Set (Setting the Clock) |
|
About this Camera (Viewing Camera Information) |
|
|
Video Out (Setting Video Out) |


Previous Next